Eats365 Products
 Merchant Guide
 Modules
 Membership
 Integrations
 Hardware
 Staff Operations
 Roles & Permissions
 Payments
 Reports
 What’s New
 Release Notes
 Troubleshooting
 Simulators
 Glossary
 Troubleshooter
 System Status
Handling Payments
Table of Contents
Make an item complimentary
Learn how to use the Comp Item function on the Eats365 POS to make an item complimentary.
The Comp Item function converts a regular-priced item into a complimentary item.
In this article, you’ll learn how to enable the Comp Item function for all relevant staff members and how to use the Comp Item function on the Eats365 POS.
Enable Comp Item
Before you start, you must first turn on the Comp Item function for all relevant staff members.
To enable Comp Item, follow the steps below:
Eats365 POS
- Log in to the Eats365 POS.
- At the top left, tap Settings
 .
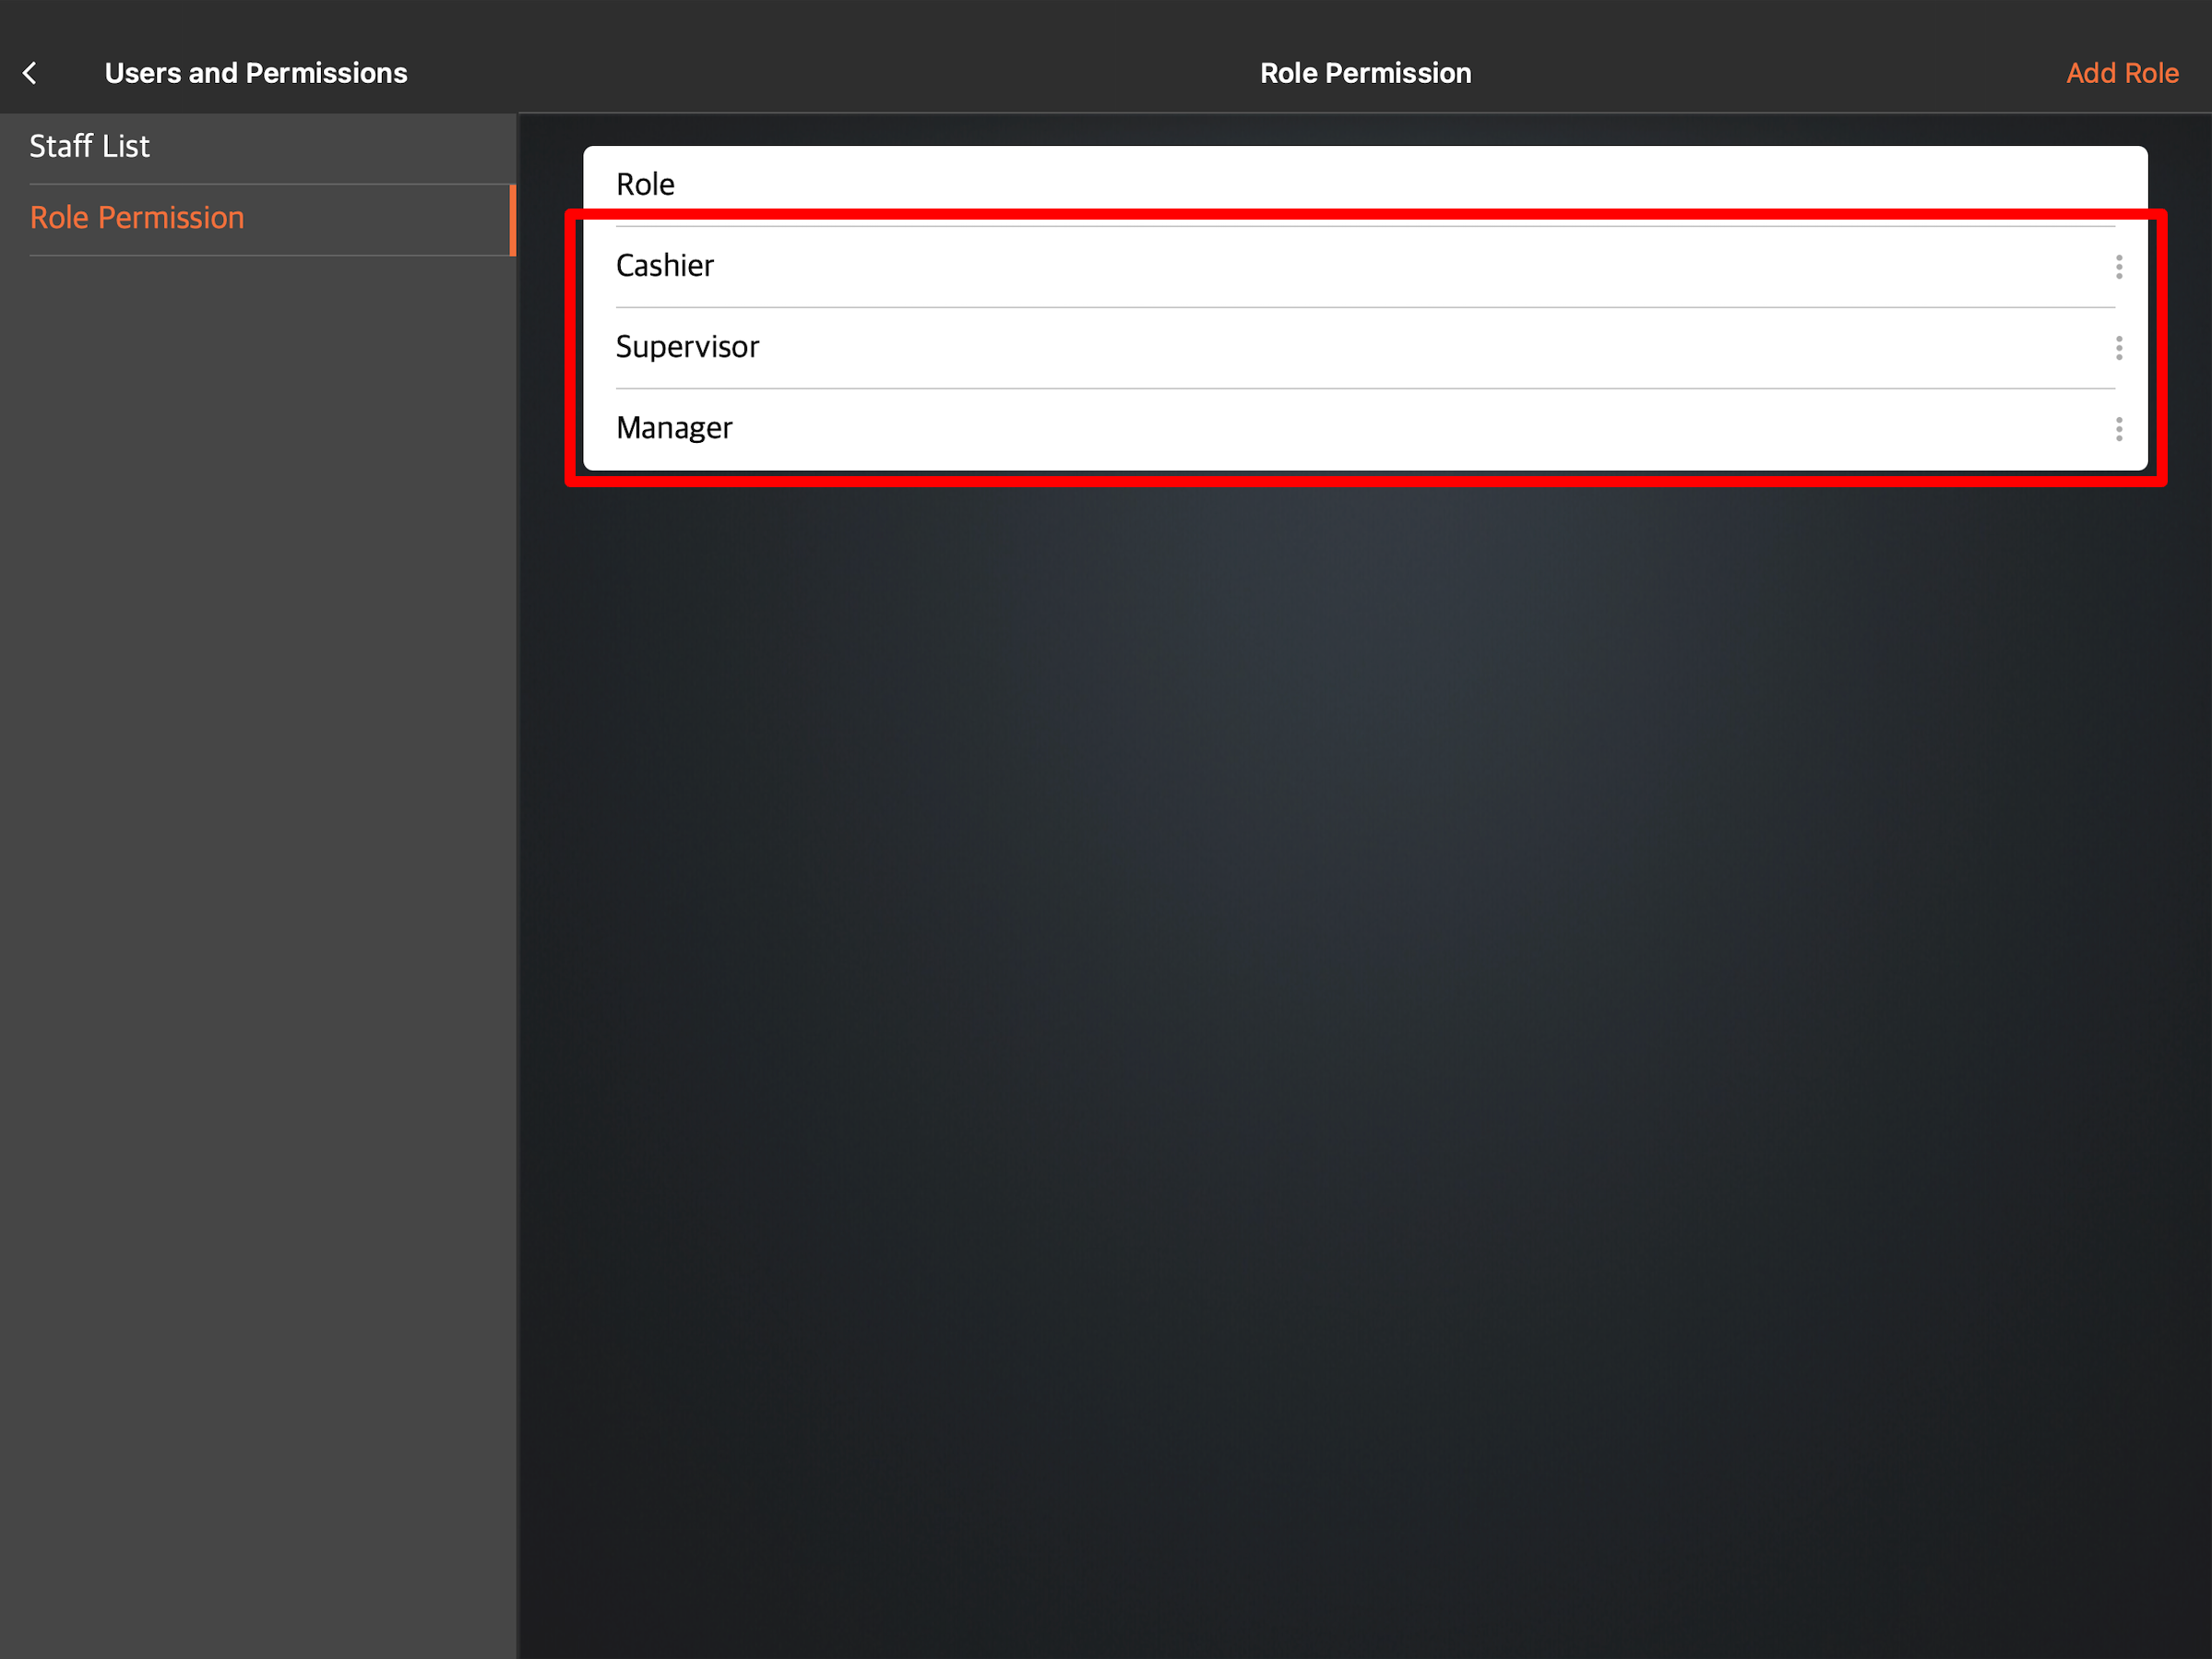
. - Under Staff, tap Users and Permissions. Then, tap Role Permission.
- Tap the role where you want to turn on the Comp Item function.
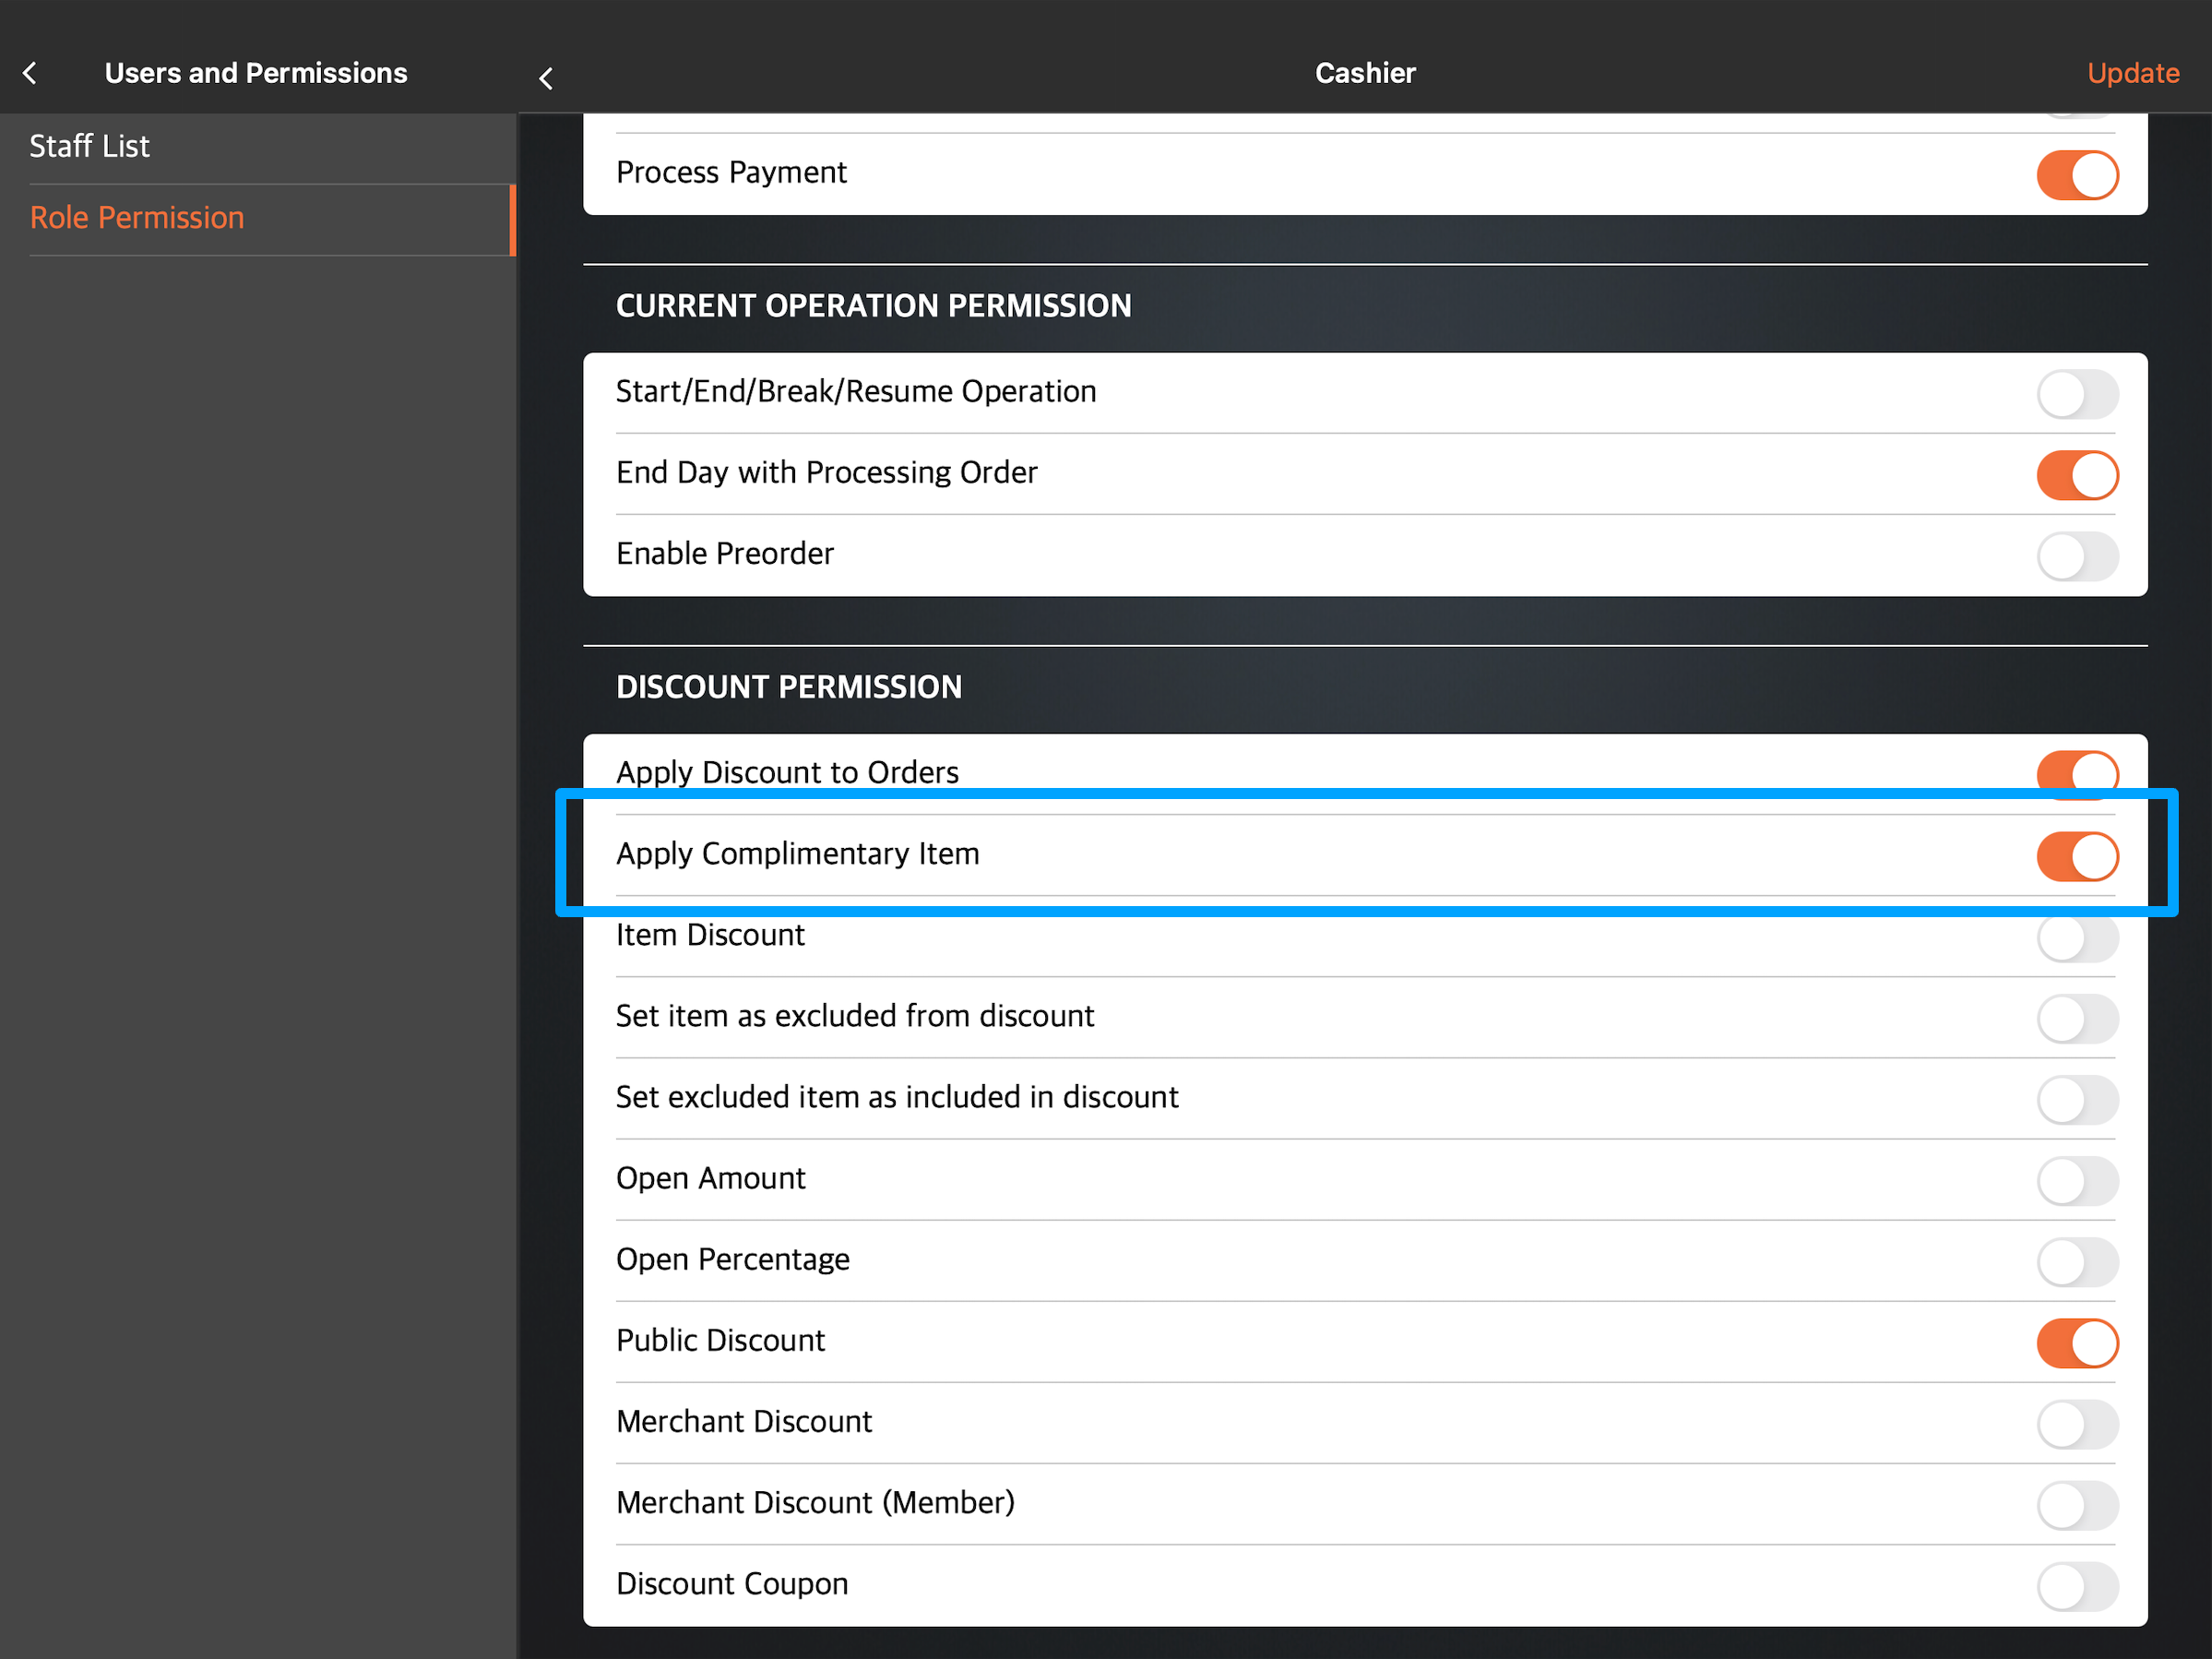
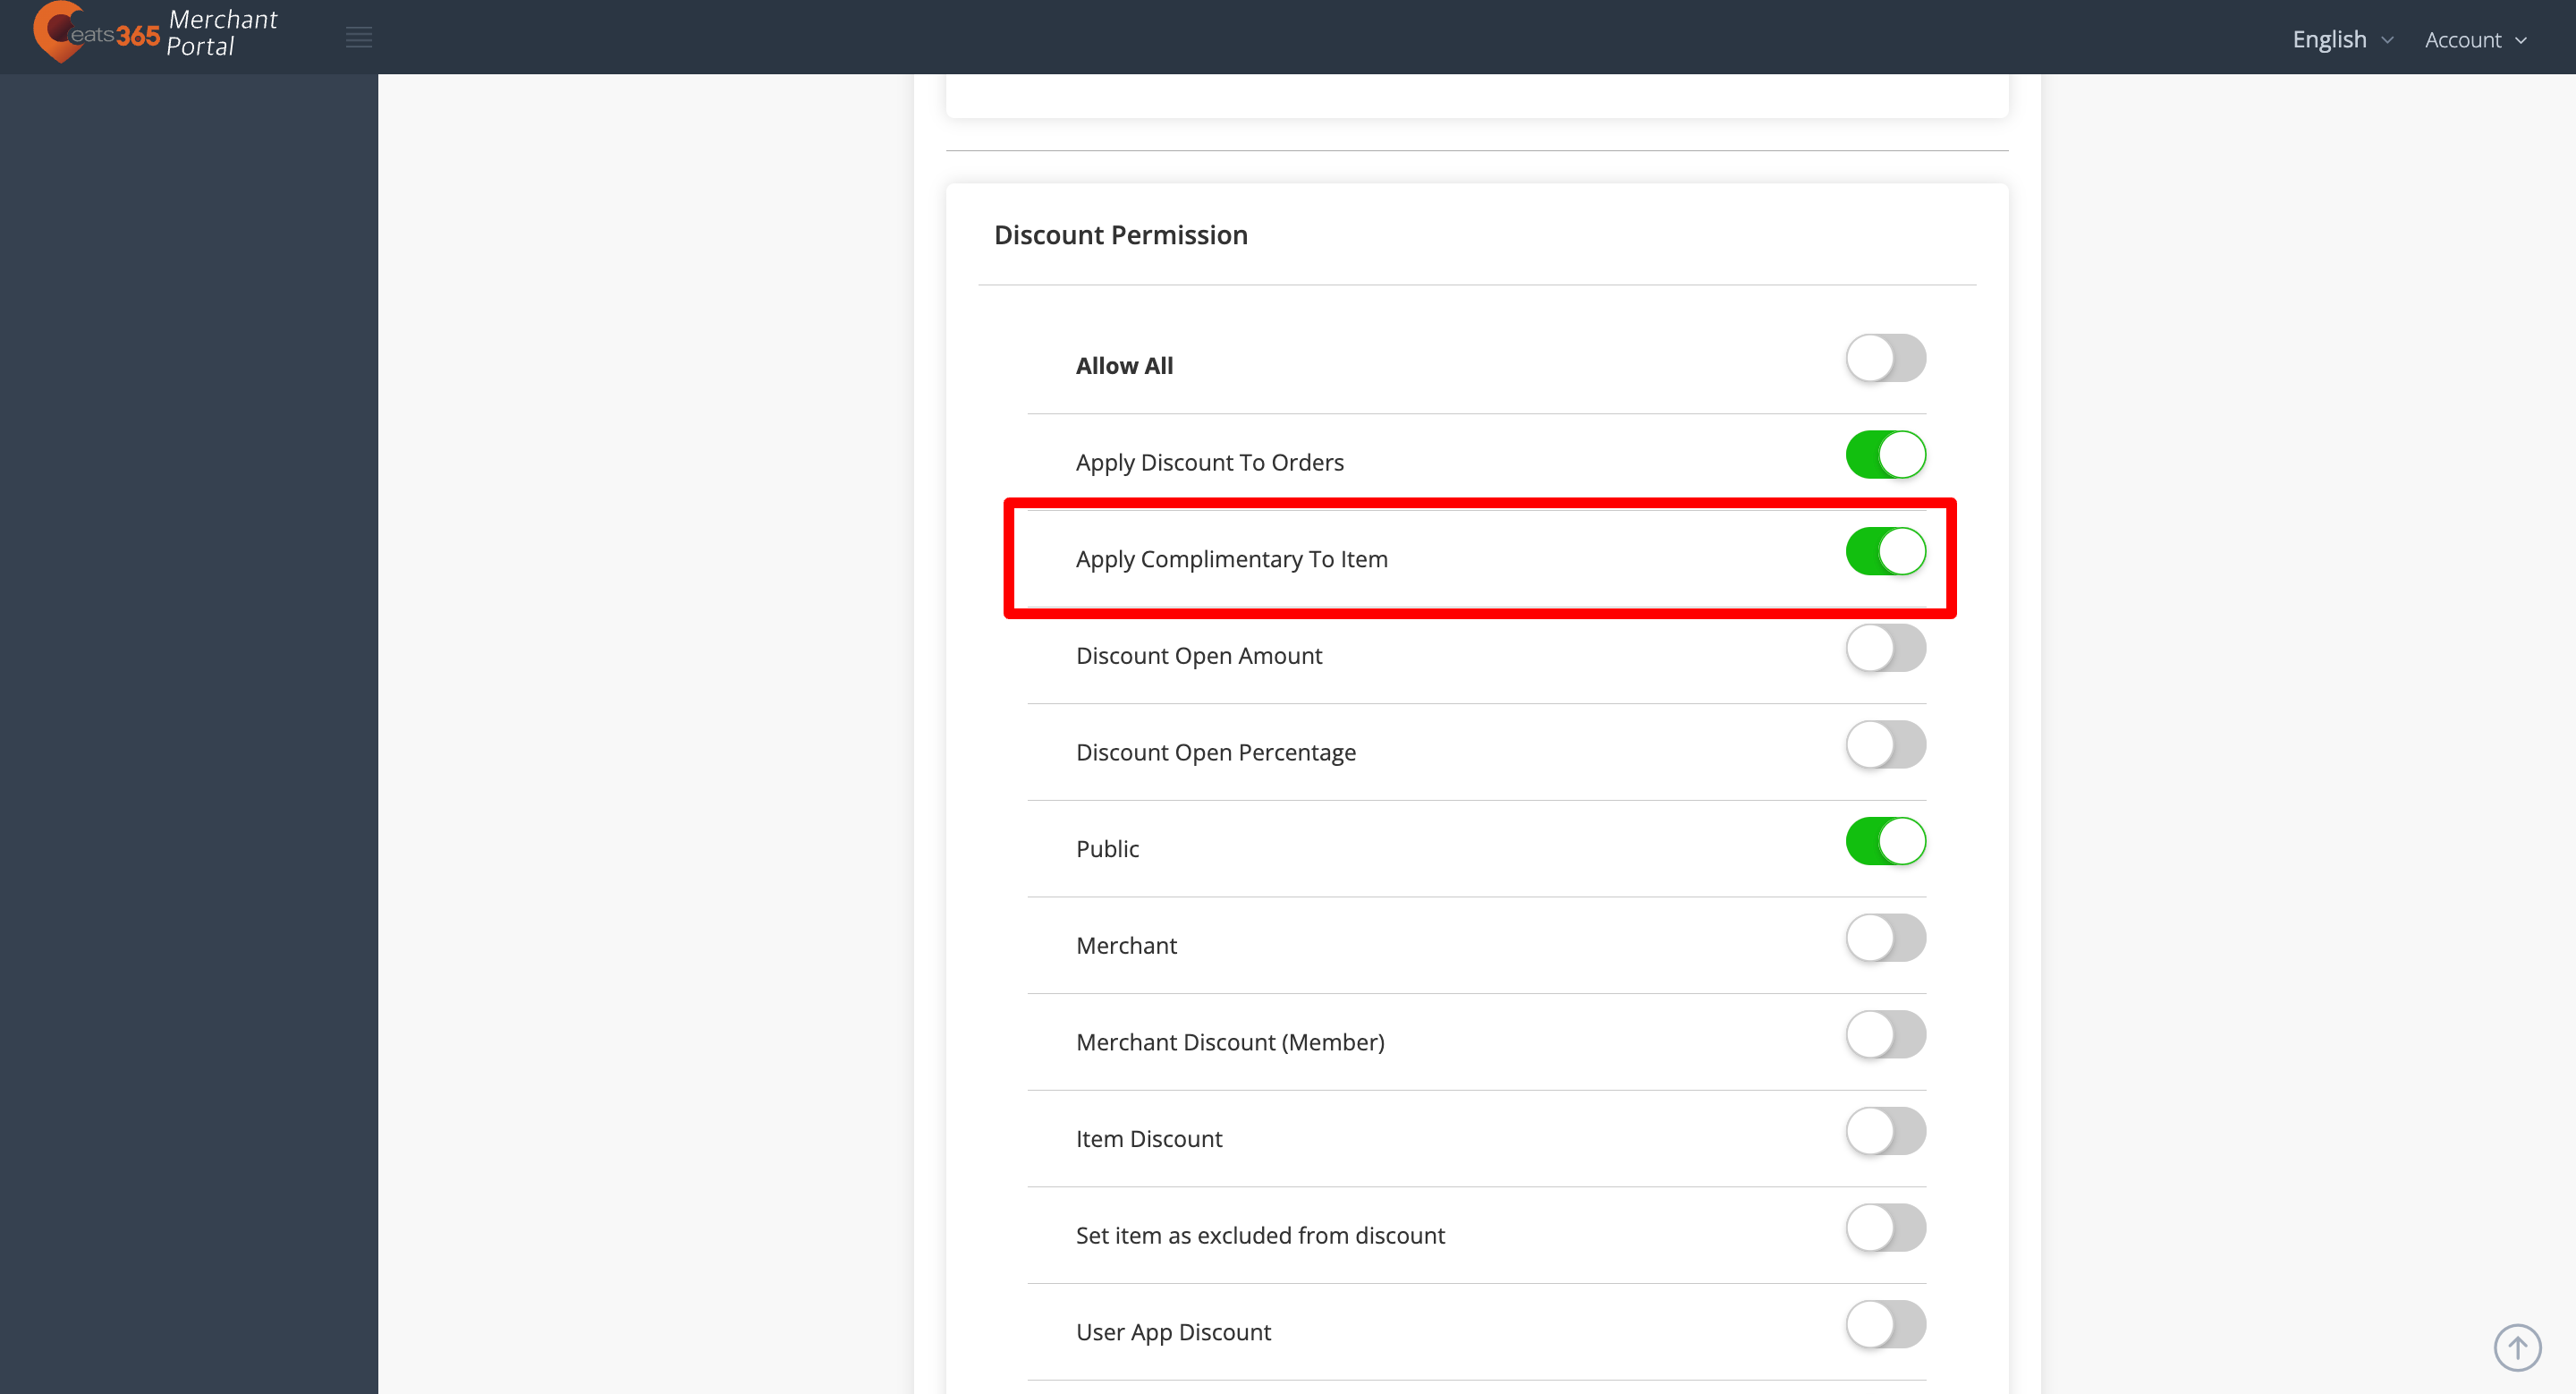
Note: By default, the Comp Item function is enabled for managers. To learn more about the default permissions available for each role, refer to Manage staff roles and permissions. - Scroll down to Discount Permission, then turn on Apply Complimentary Item
 .
.
- At the top right, tap Update to confirm changes.
Merchant Portal (Classic Theme)
- Log in to the Merchant Portal.
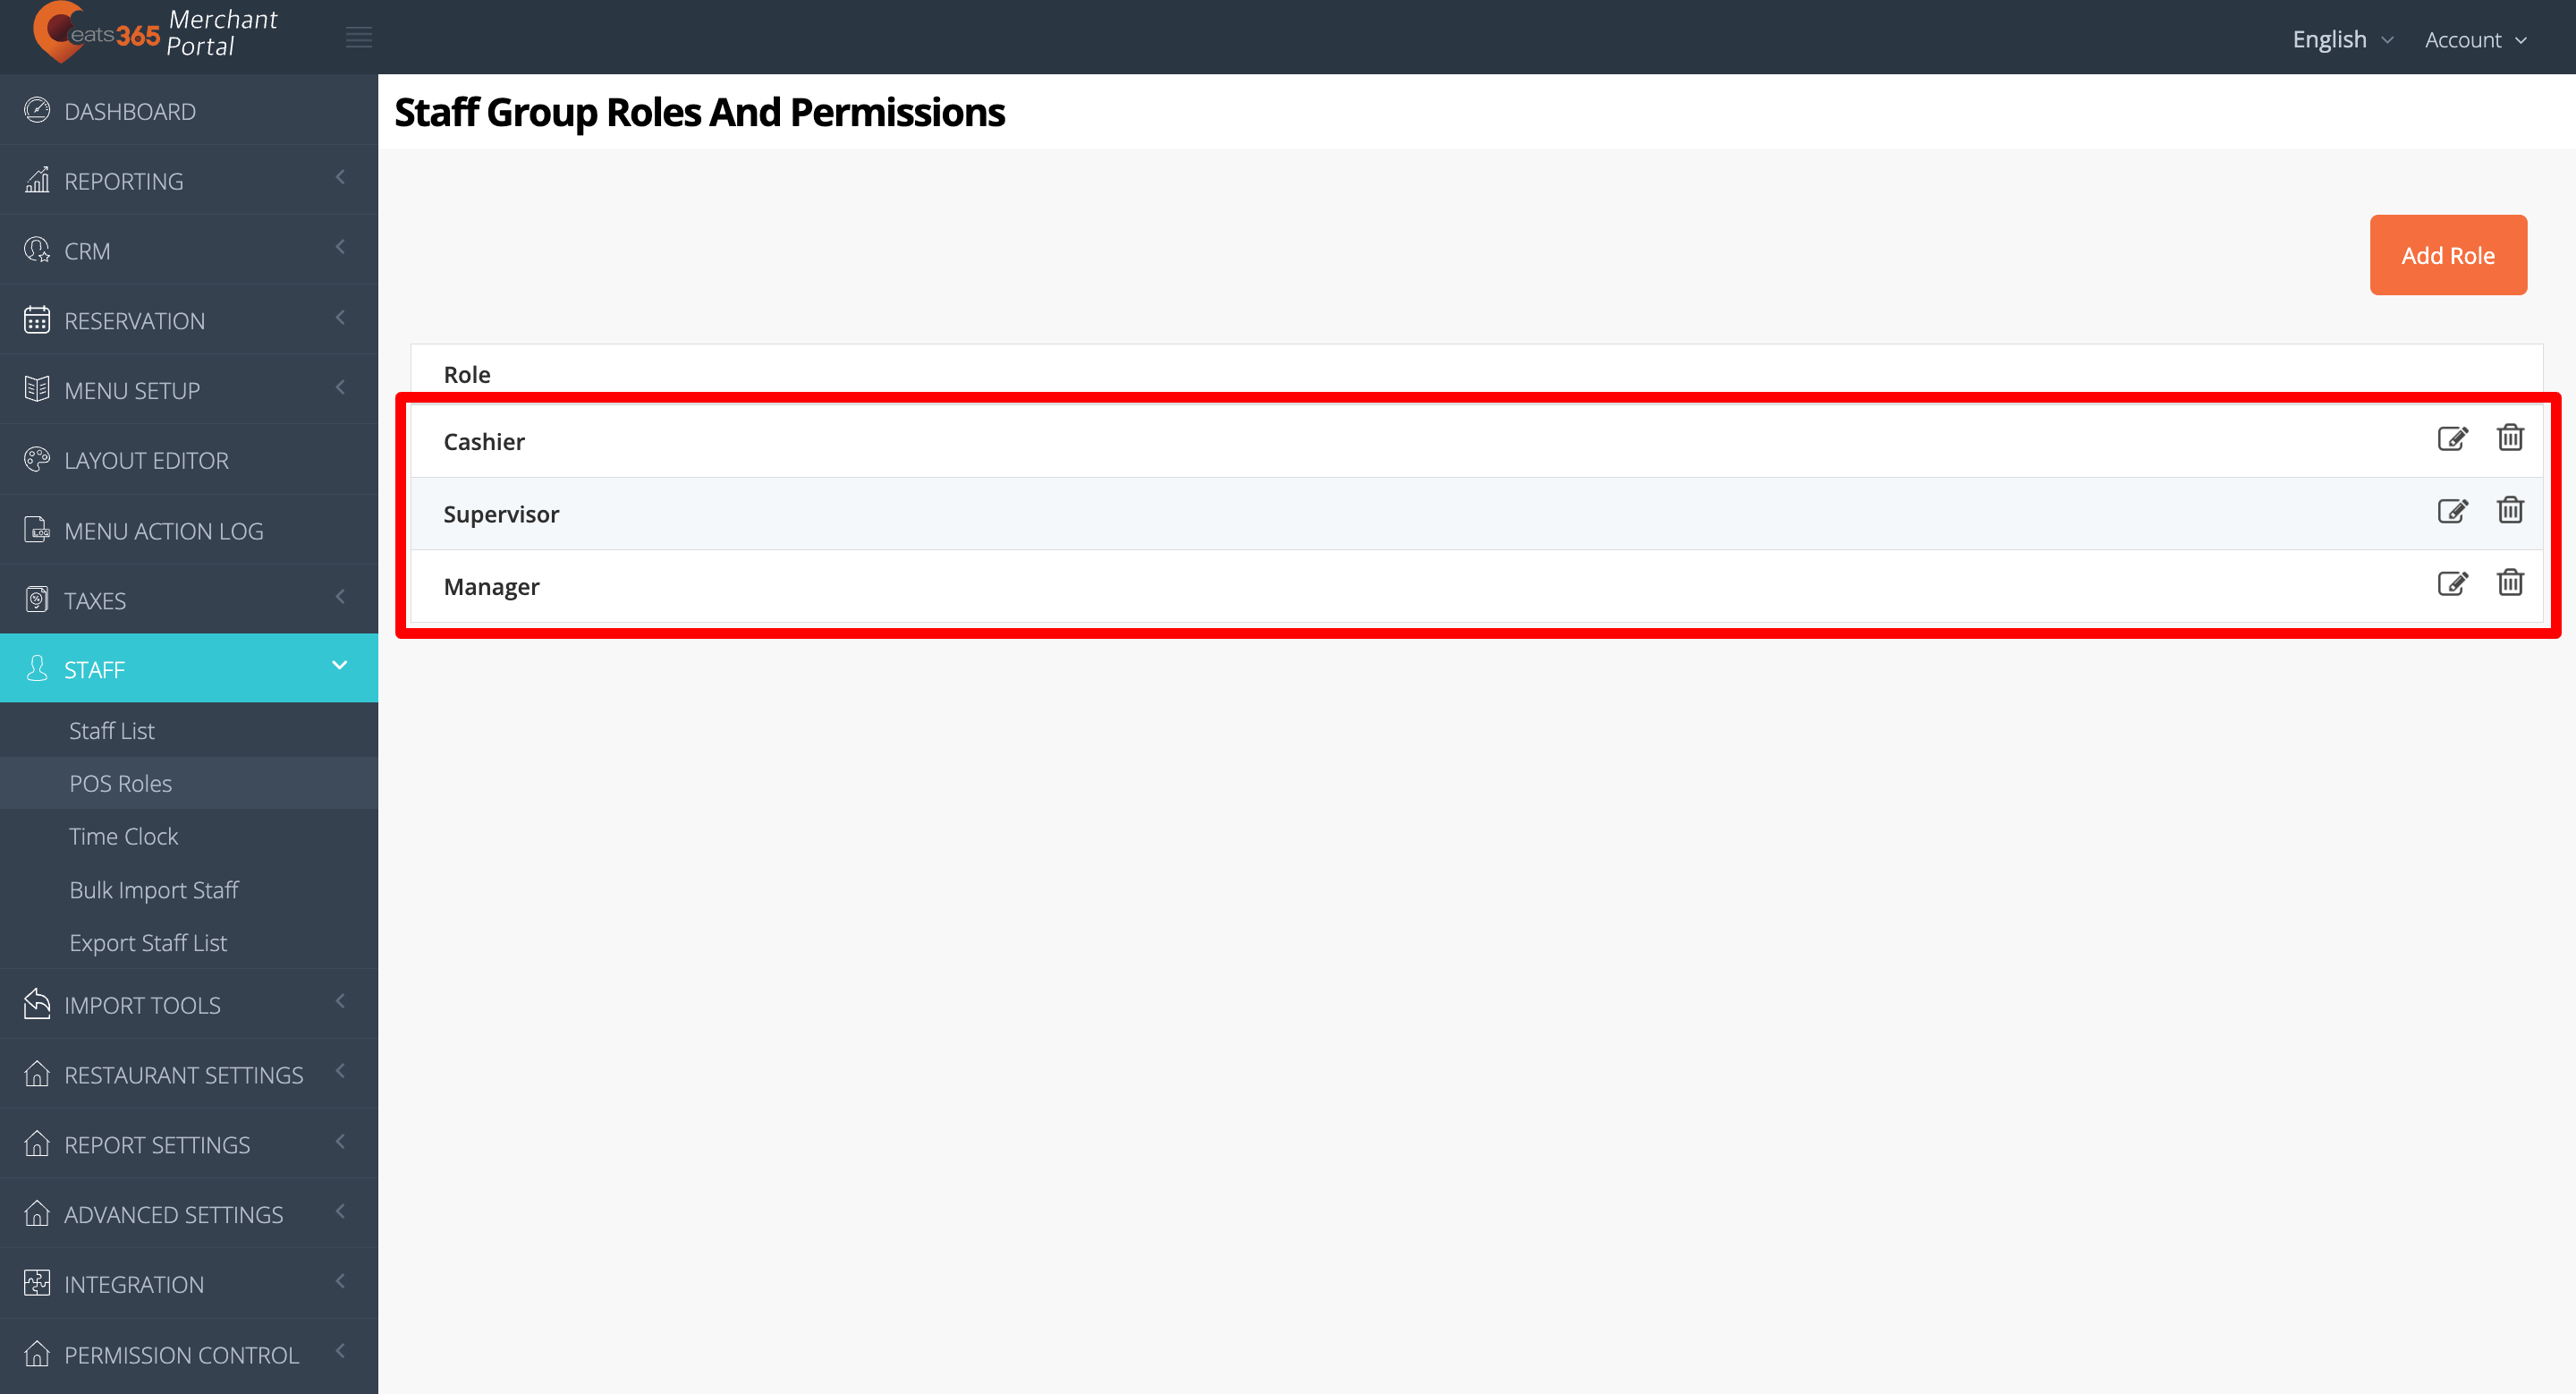
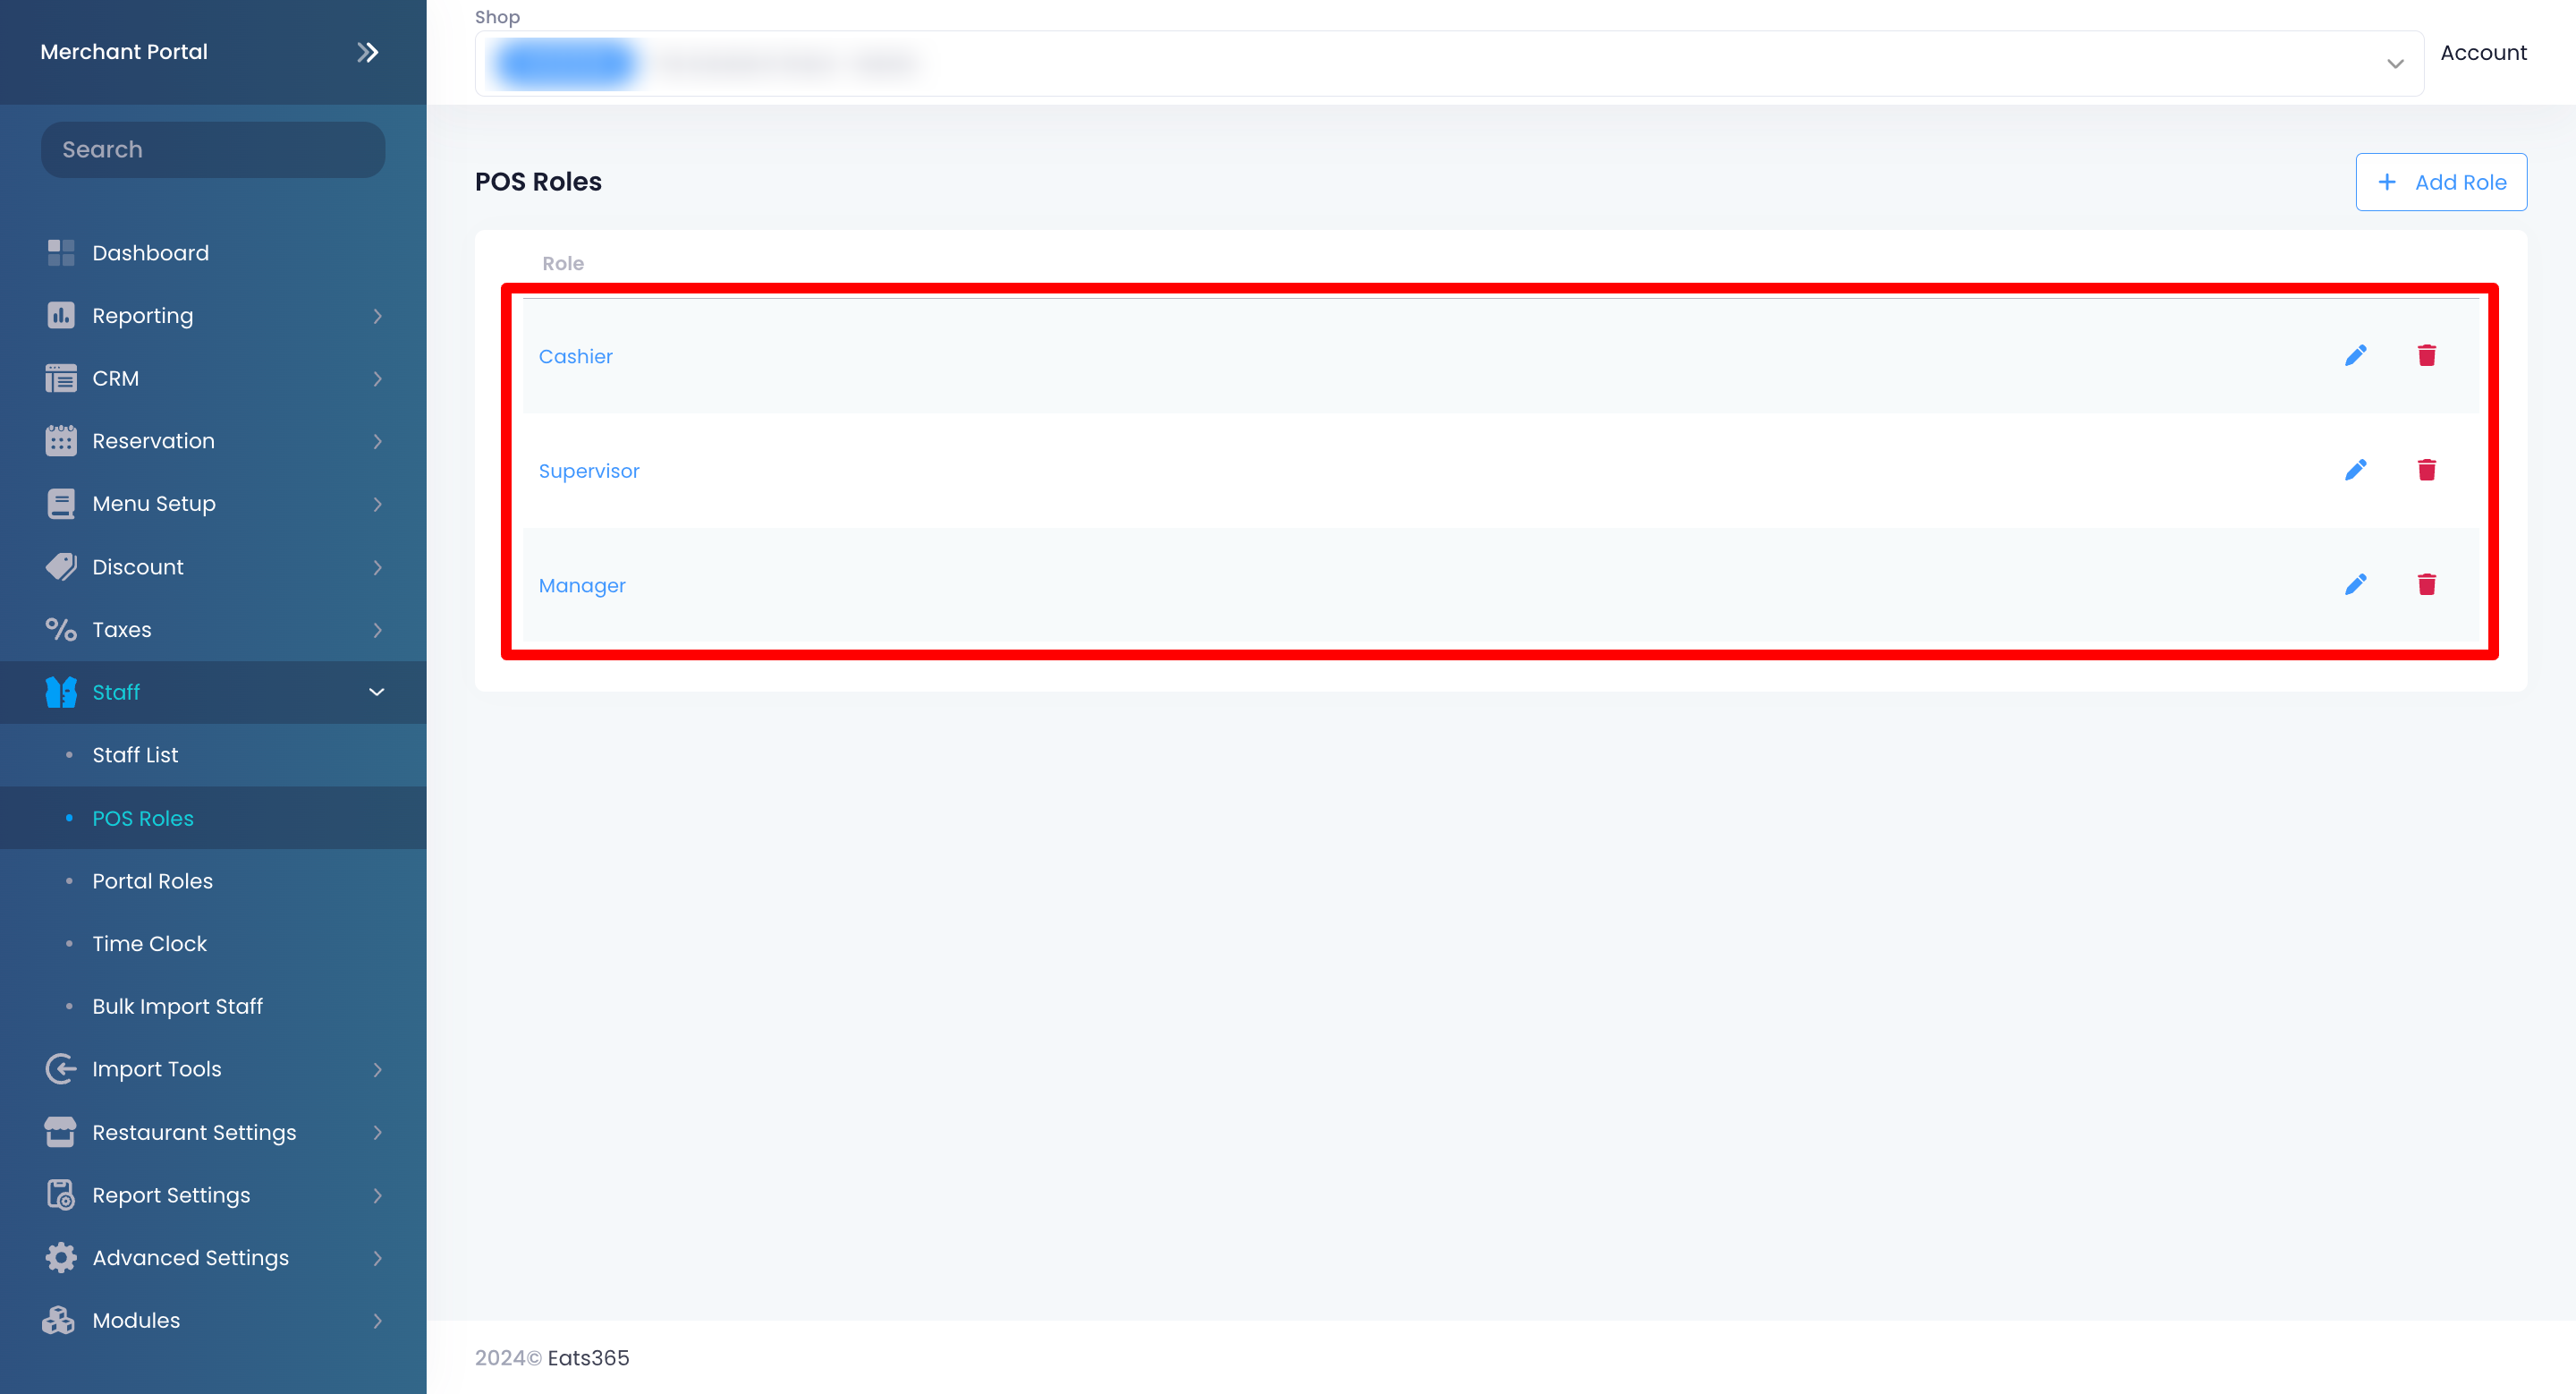
- On the left panel, click on Staff. Then, select POS Roles.
- Next to the role where you want to turn on the Comp Item function, click on Edit
 .
.
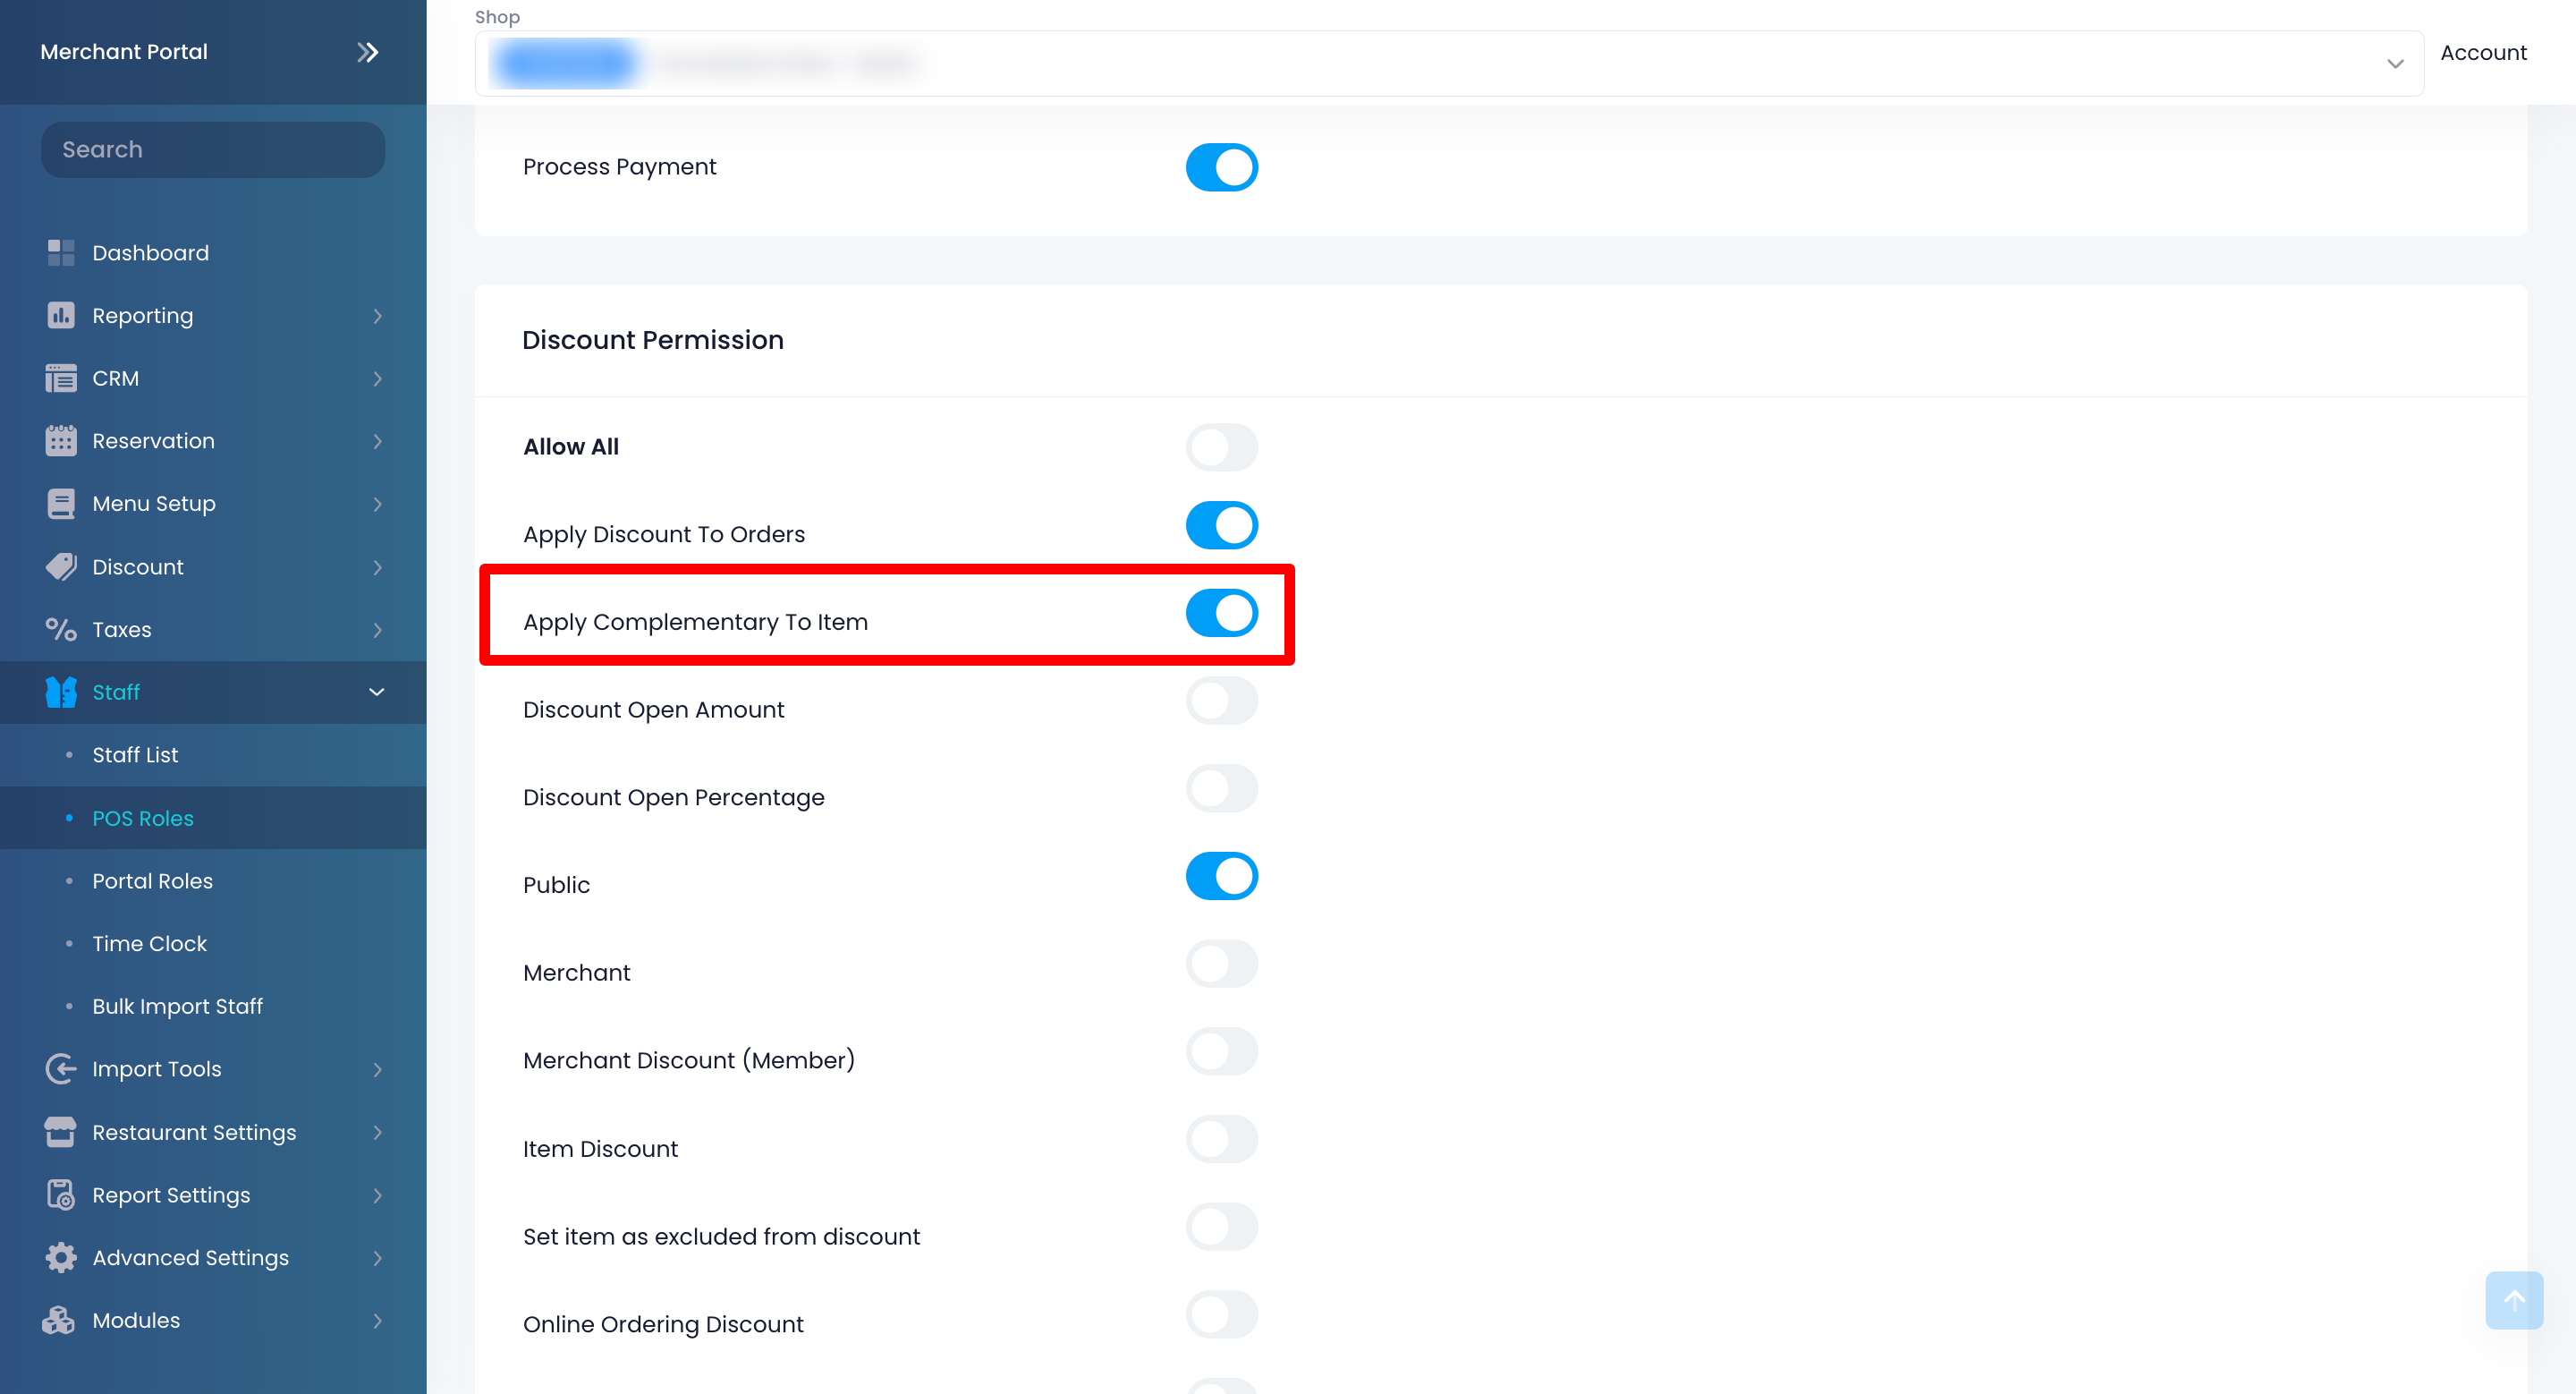
Note: By default, the Comp Item function is enabled for managers. To learn more about the default permissions available for each role, refer to Manage staff roles and permissions. - Scroll down to Discount Permission, then turn on Apply Complimentary To Item
 .
.
- Scroll down to the bottom, then click on Save to confirm changes.
Merchant Portal 2.0
- Log in to the Merchant Portal.
- On the left panel, click on Staff. Then, select POS Roles.
- Next to the role where you want to turn on the Comp Item function, click on Edit
 .
.
Note: By default, the Comp Item function is enabled for managers. To learn more about the default permissions available for each role, refer to Manage staff roles and permissions. - Scroll down to Discount Permission, then turn on Apply Complimentary To Item
 .
.
- Click on Save to confirm changes.
Comp an item
To convert a regular-priced item to a complimentary item, follow the steps below:
- On the order-taking screen, tap an item that has been added to the order list. The Action Buttons appear beside the item.
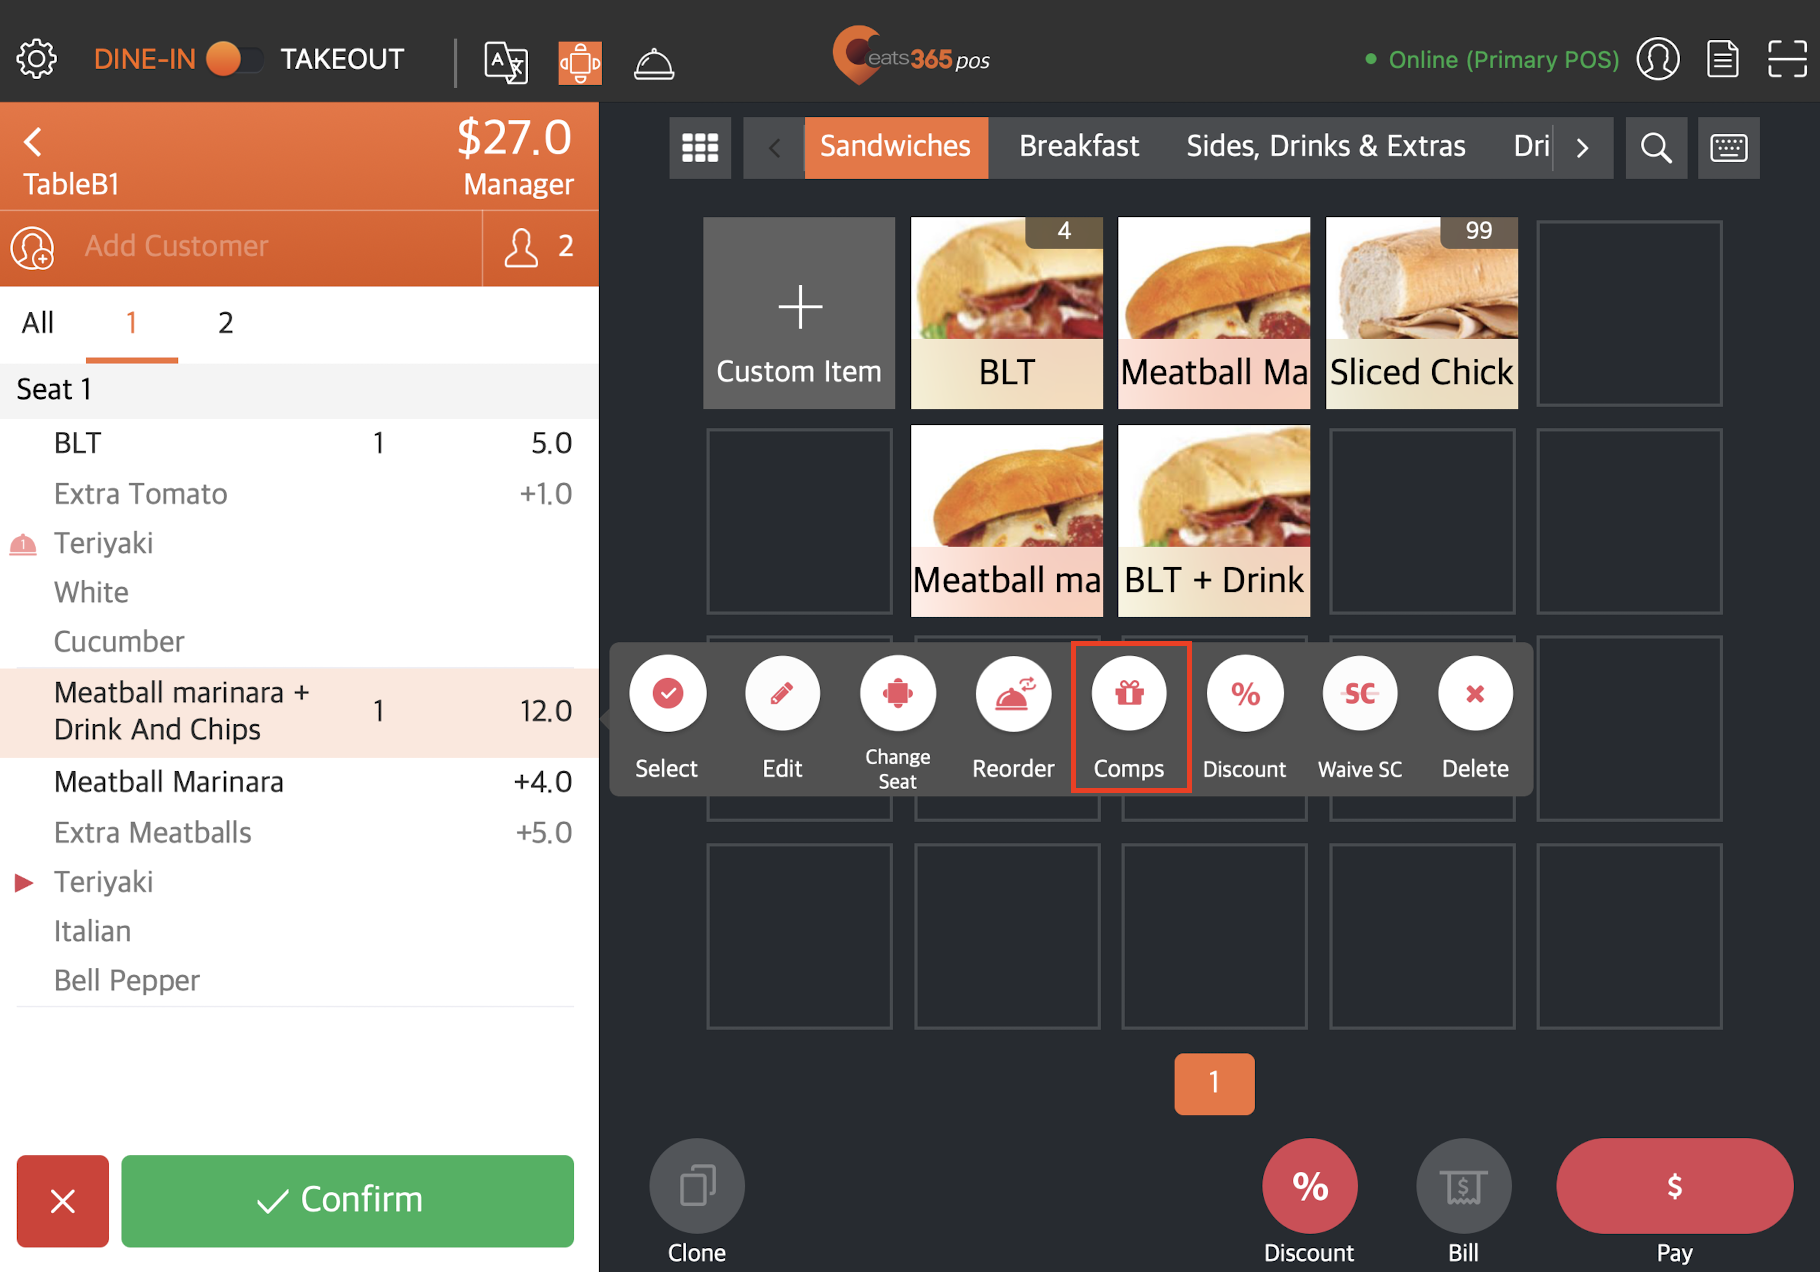
- Tap Comps
 .
.
Note: If you’ve enabled Preset Discount Reason under System Preferences, a pop-up message prompts you to enter a reason.
- Tap Confirm to comp the item.
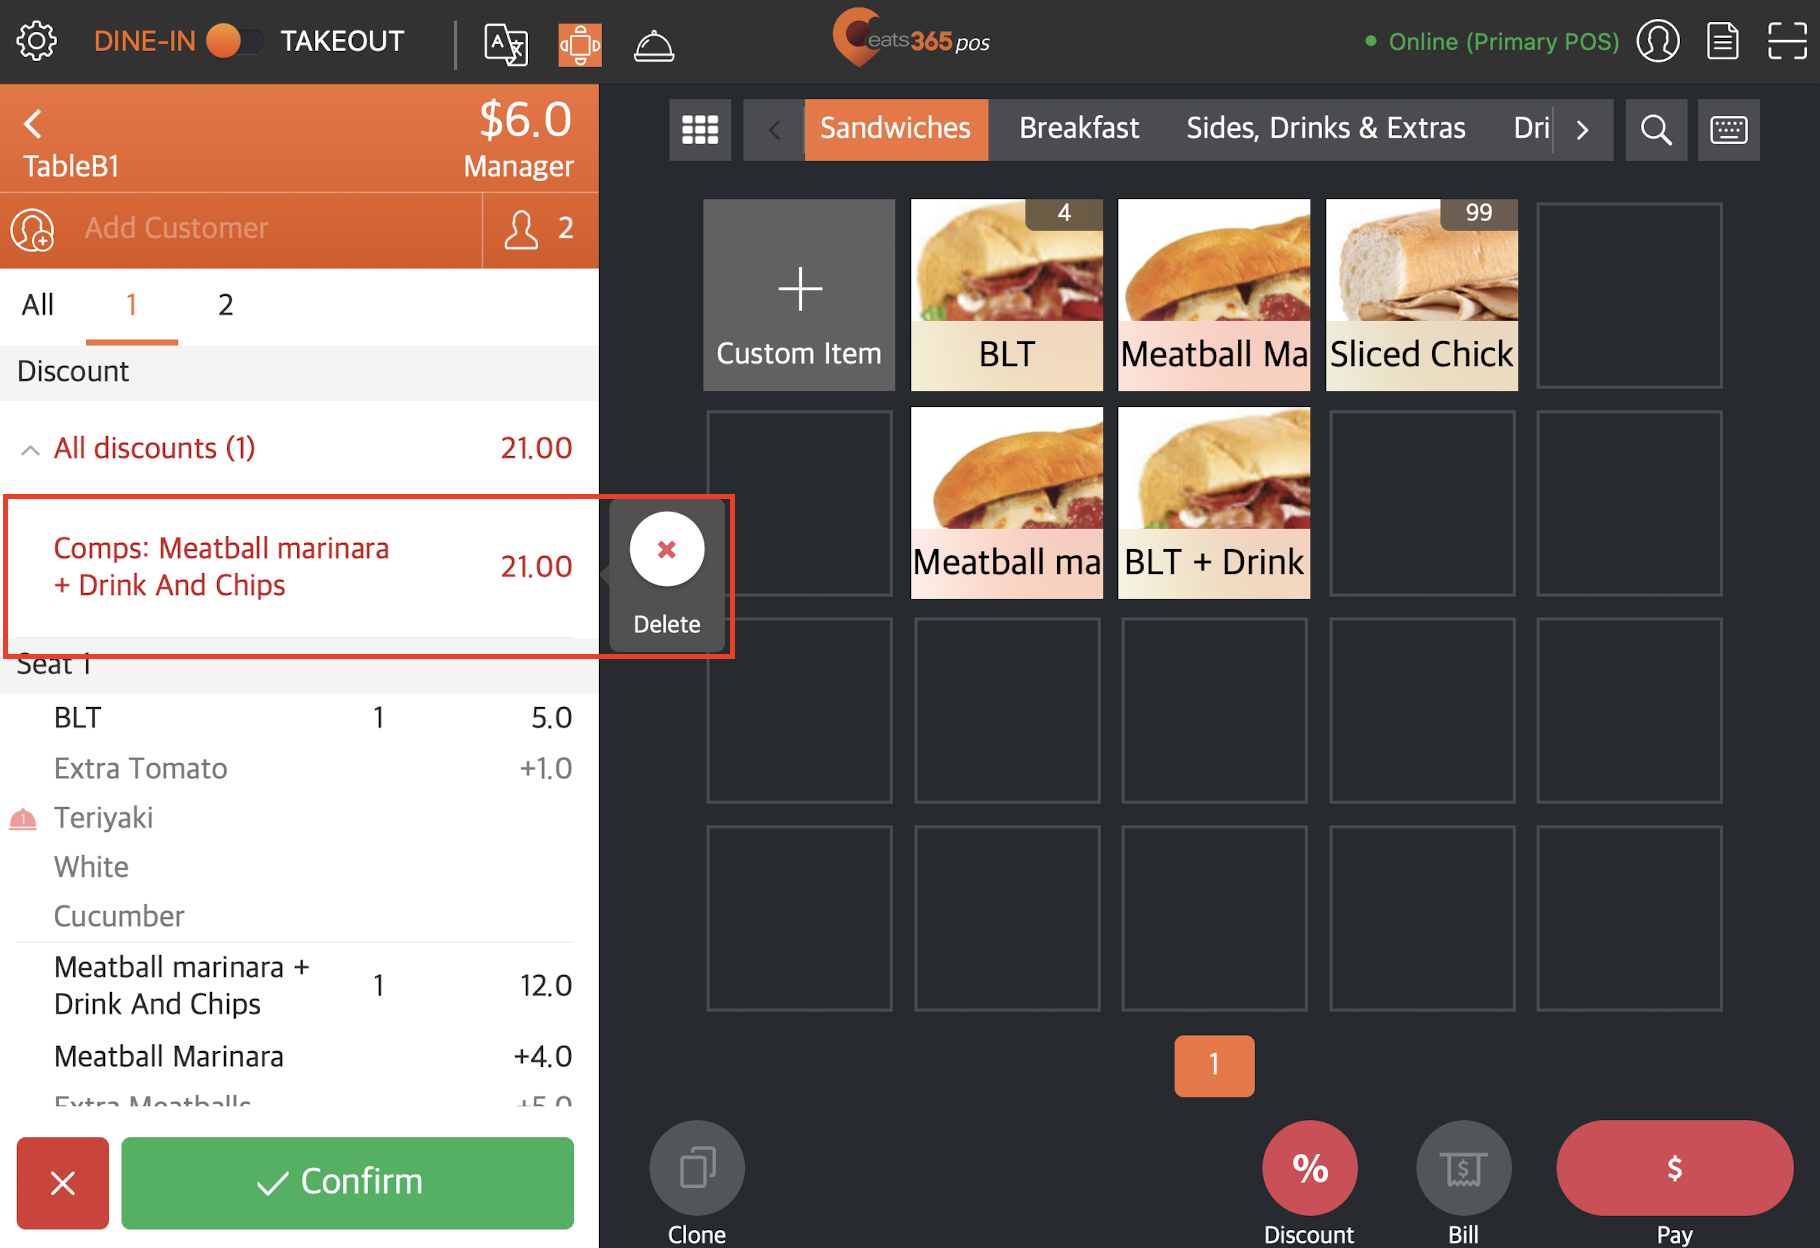
Remove complimentary item
If you want to remove an item tagged as complimentary on the order list, tap the item that has been converted to a Comp Item.
To remove the item, tap Delete  . The Comp Item returns to the order list as a regular-priced item.