 Eats365 Products
 Merchant Guide
 Modules
 Membership
 Integrations
 Hardware
 Staff Operations
 Roles & Permissions
 Payments
 Reports
 What’s New
 Release Notes
 Troubleshooting
 Simulators
 Glossary
 Troubleshooter
 System Status
Order Handling
All Product
Table of Contents
Add items to an order (Food Court)
Learn how to take and process dine-in and takeout orders for food court restaurants on the Eats365 POS.
Once the customer is ready to order, you can then take their orders and process them on the POS.
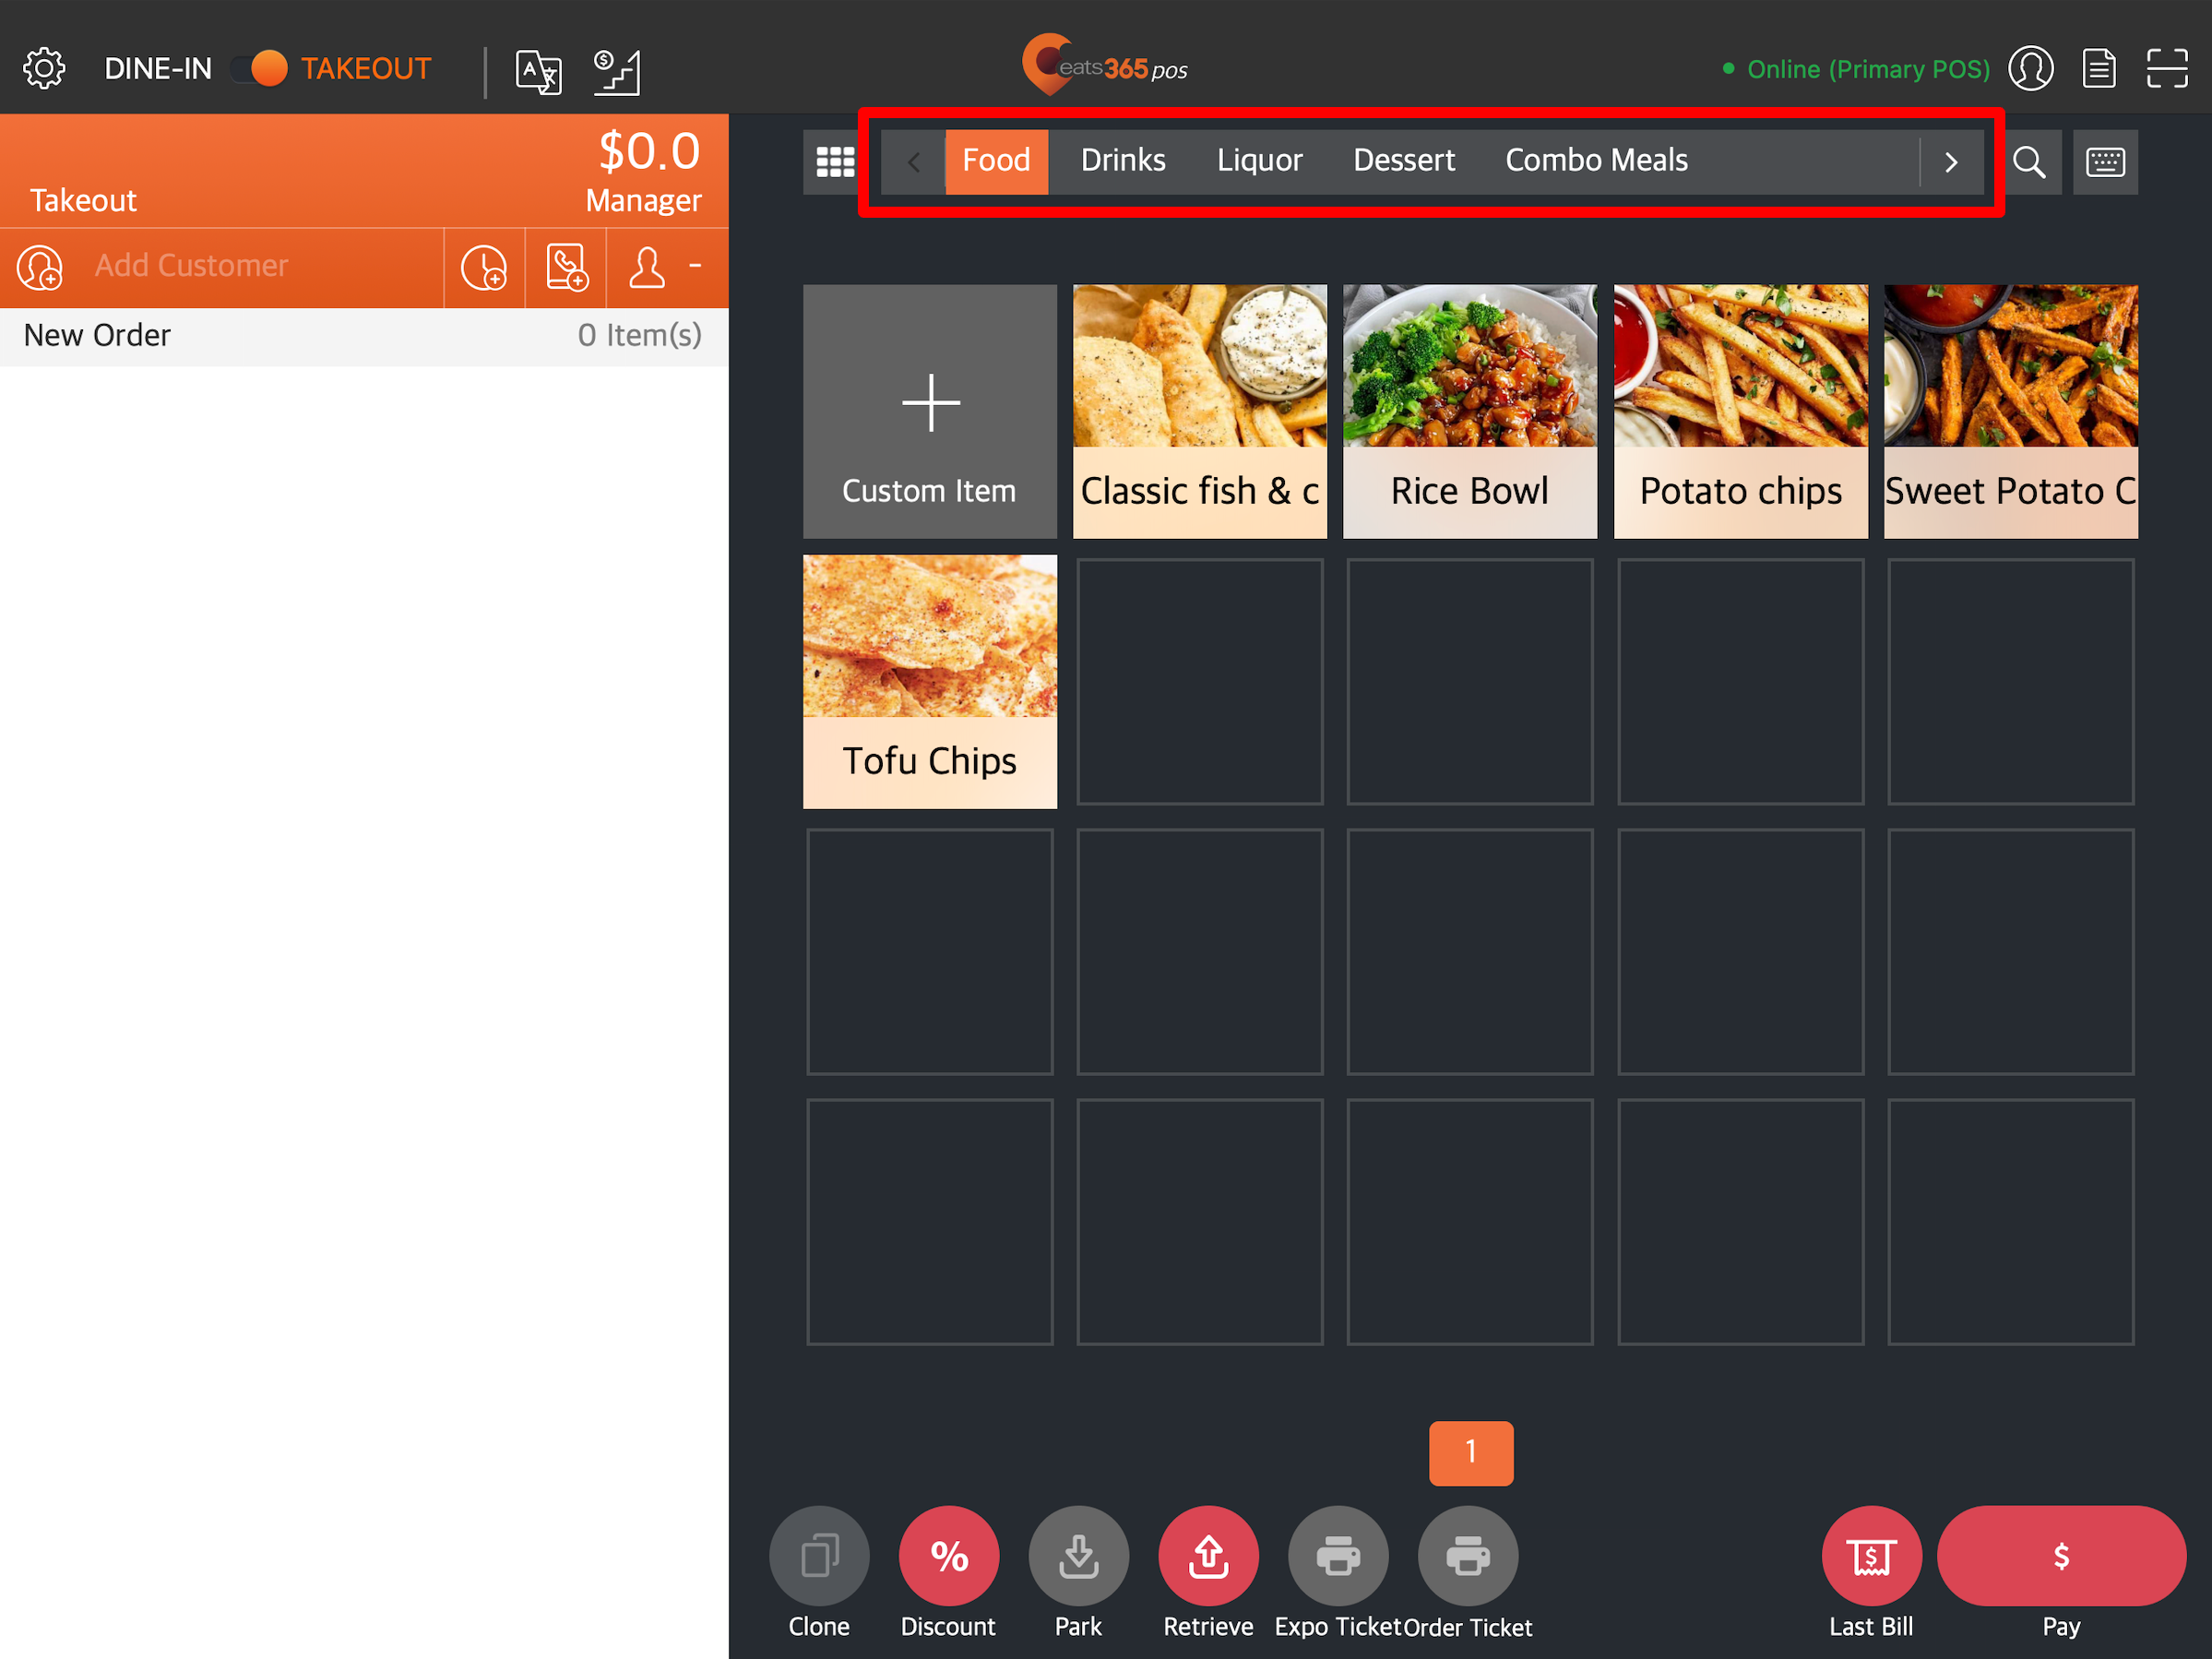
Add items to an order
To add items to an order, follow the steps below:
- Log in to the Eats365 POS.
- At the top left, tap Dine-in or Takeout to get to the order-taking screen.

- On the order-taking screen, select the items that you want to add to the customer's order.
Note: Items exclusive to member plans can only be purchased by customers whose active membership includes the required plan.- To browse through different categories, tap the left and right arrows on the categories bar.
- If you’re using a POS intended for central cashier, you can tap All
 to switch between different vendor menus.
- To browse through different categories, tap the left and right arrows on the categories bar.
- When you’ve completed adding the items to the customer’s order, tap Confirm.
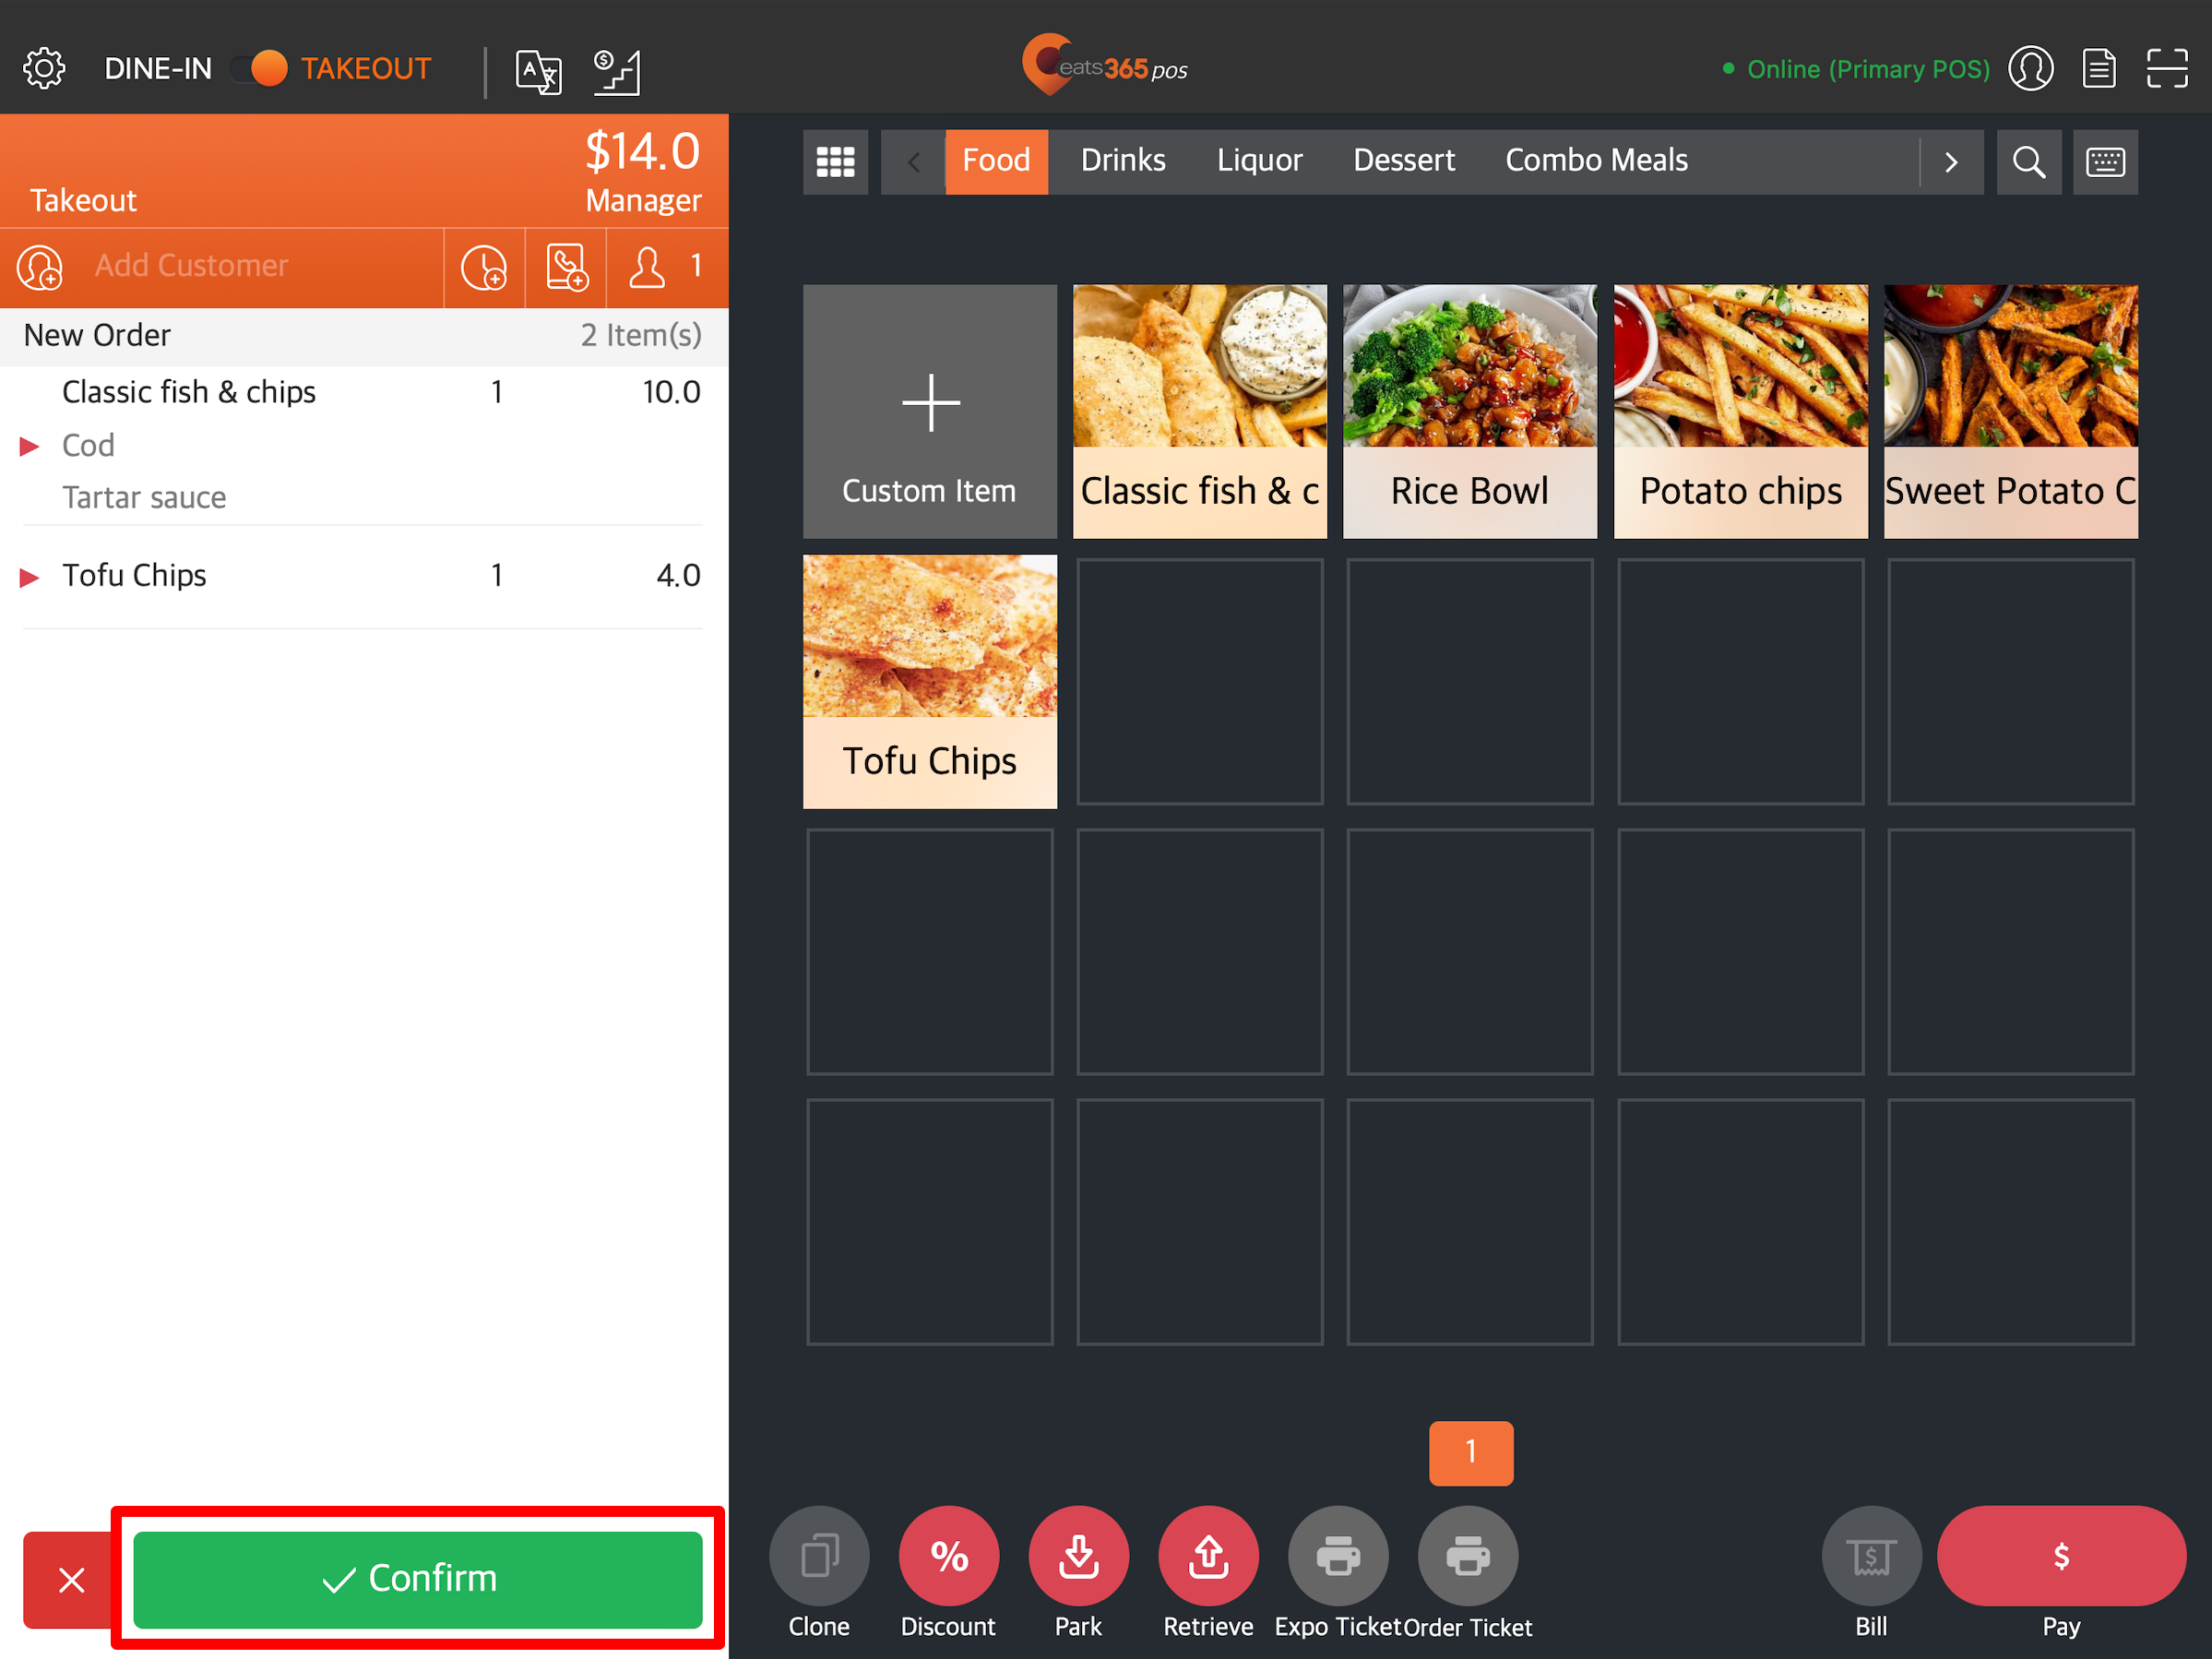
Note:- By default, the central cashier POS requires payment after placing an order. If you’re using a POS intended for the central cashier, tap Pay to proceed to the payment screen.
- If “Require Payment when Placing Order” has been enabled from the Dine-In or Takeout settings for vendor accounts, the vendor POS won’t display the “Confirm” button. Instead, the stall will be required to complete the payment before they can place the order.
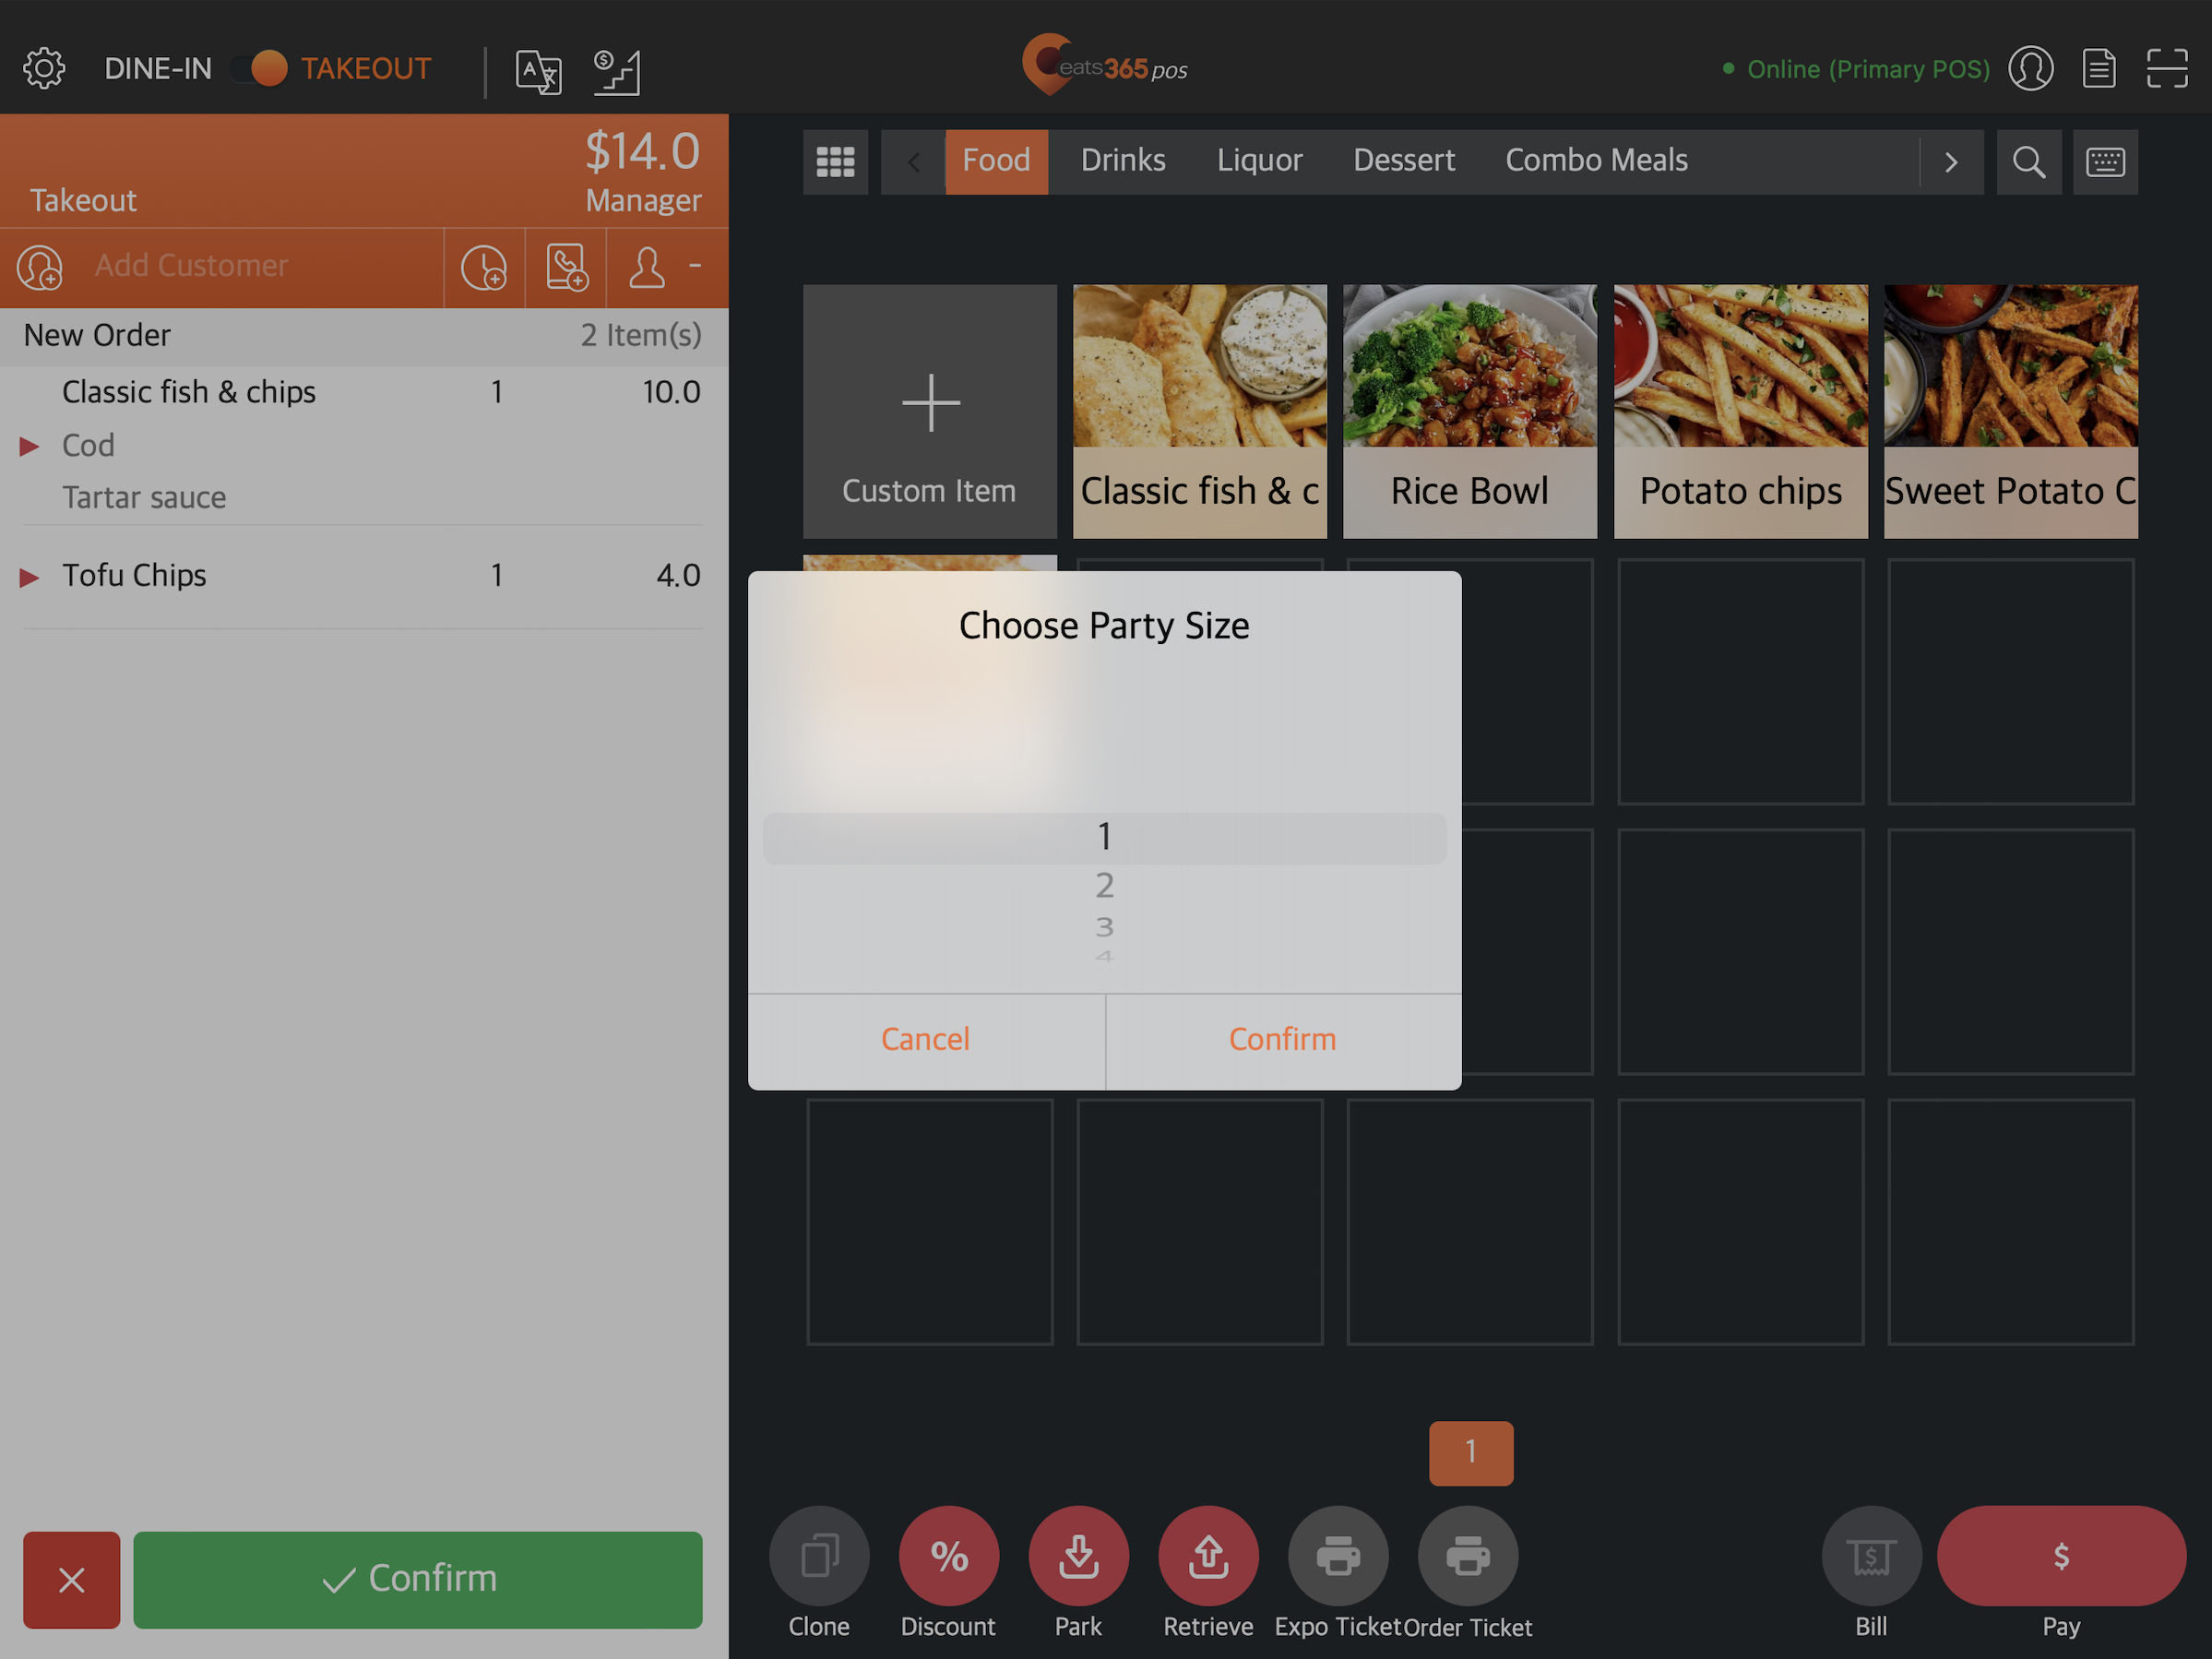
- If “Force Enter Party Size” has been enabled from the Dine-In or Takeout settings, you must enter the party size after tapping Confirm.
Add more items to an existing order
To add more items to an existing order, follow the steps below:
- Log in to the Eats365 POS.
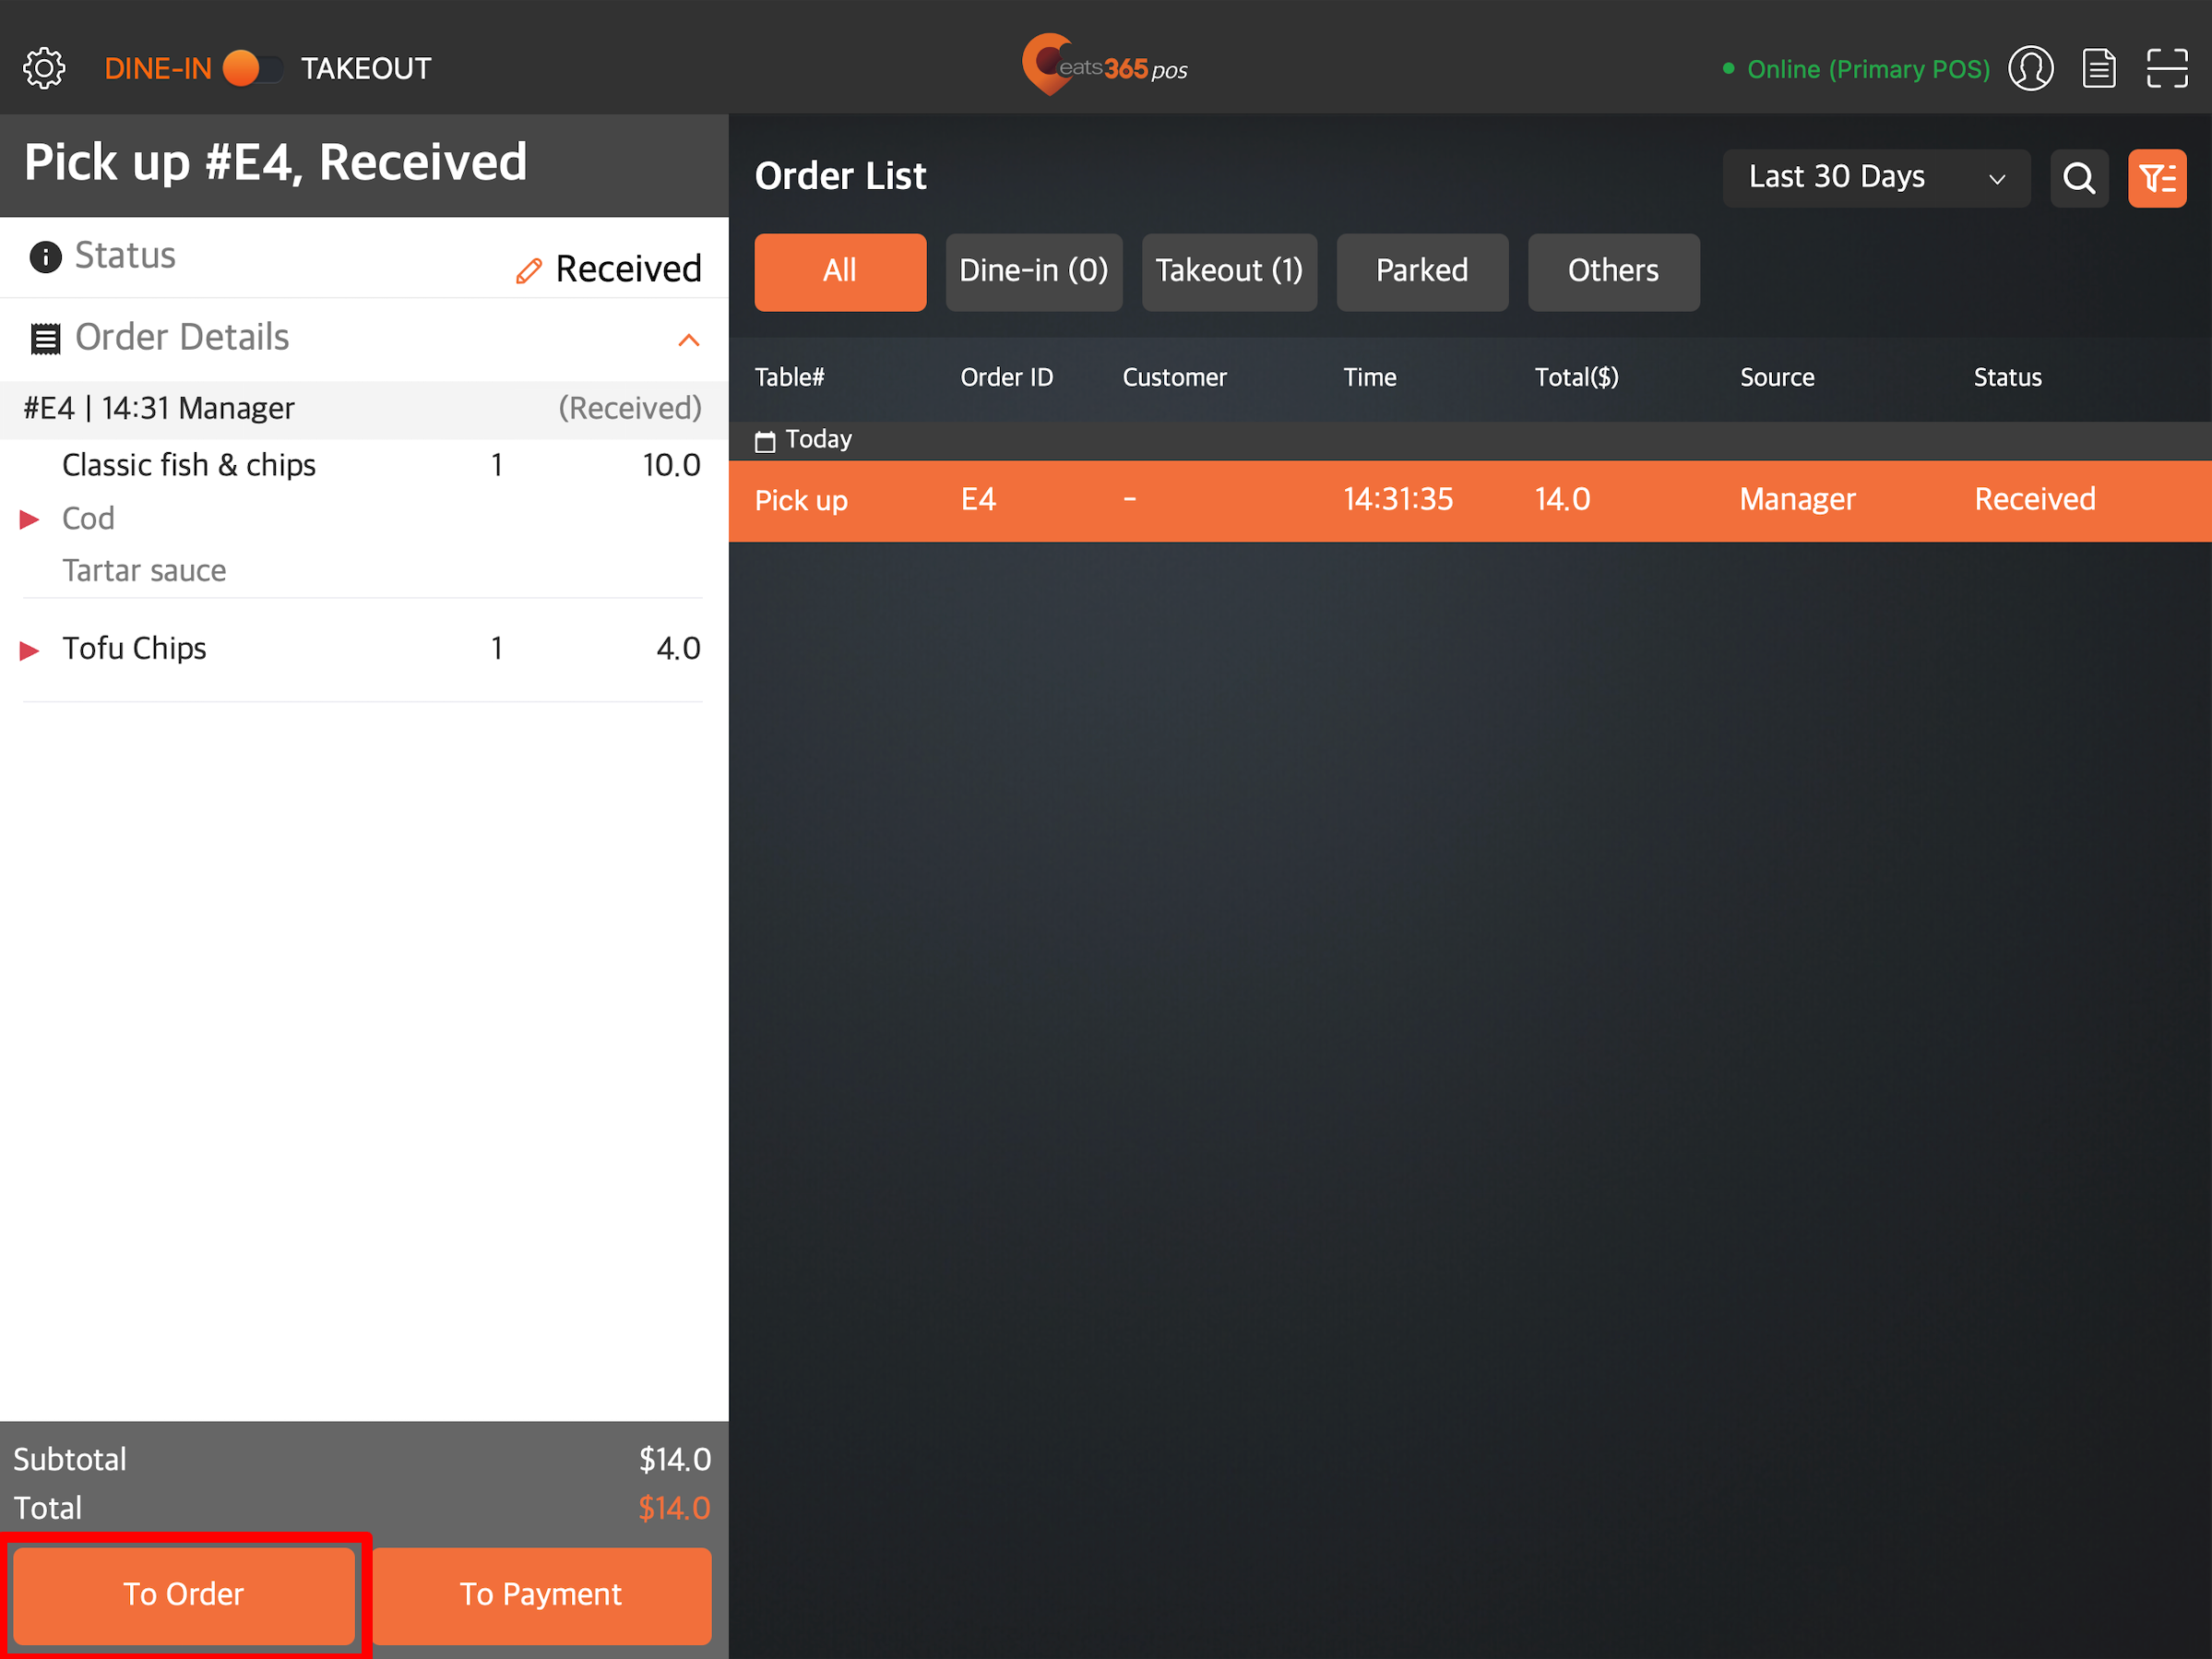
- At the top right, tap Order List
 . Then, select All.
 - Tap the order that you want to add items to.
- At the bottom of the order, tap To Order.
- On the order-taking screen, select the items that you want to add to the customer's order.
Note: Items exclusive to member plans can only be purchased by customers whose active membership includes the required plan.- To browse through different categories, tap the left and right arrows on the categories bar.
- To browse through different categories, tap the left and right arrows on the categories bar.
- When you’ve completed adding the items to the customer’s order, tap Confirm.